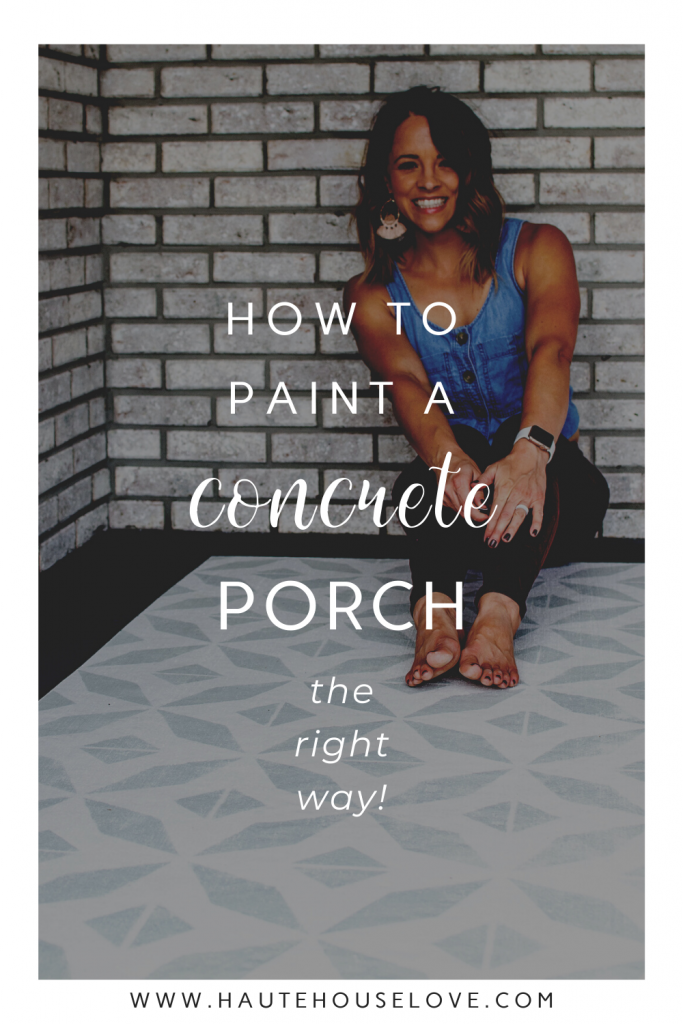
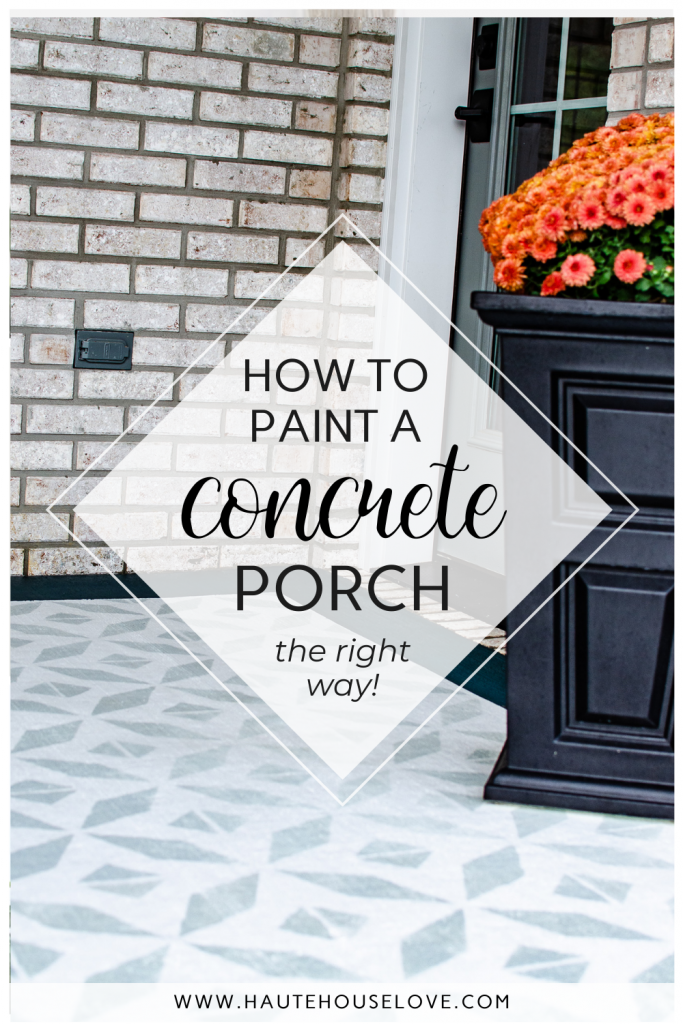
the Ultimate Guide to the Perfect Painted Concrete Porch
If you’re looking for a unique way to add personality and flair to a concrete porch, this is the guide!
Today, I will be taking you through all of the correct steps that I took to get our side porch prepped, painted and beautiful THE FIRST TIME! In the past I have painted a total of three concrete porches. The first one that I painted in 2019 was our large back porch in our former Indiana home..
Unfortunately, I didn’t do enough research ahead of time, and I completely botched the project. Though the end result was beautiful, the road to get there was a huge mess with pivots and setbacks, and lessons learned along the way. When I decided to paint the second porch in 2020, I was ready for redemption!
Here is my process – PLUS A 2022 UPDATE!

read before starting – this is important!
If you are thinking about painting a concrete porch, you will want to make sure that you prep properly! This project is extremely time-consuming because it involves a lot of little steps over multiple days. In order to do this correctly, you need to wait 24 hours in between each of these steps.
You may also want to read: Paint Colors in Our Modern Eclectic Home
jump to contents:
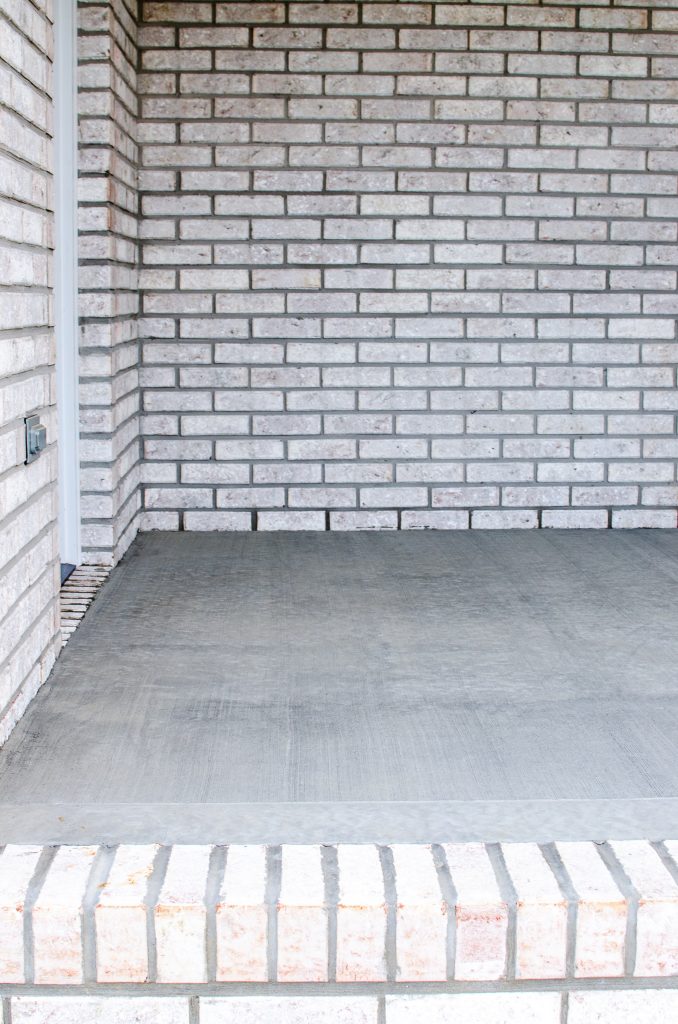
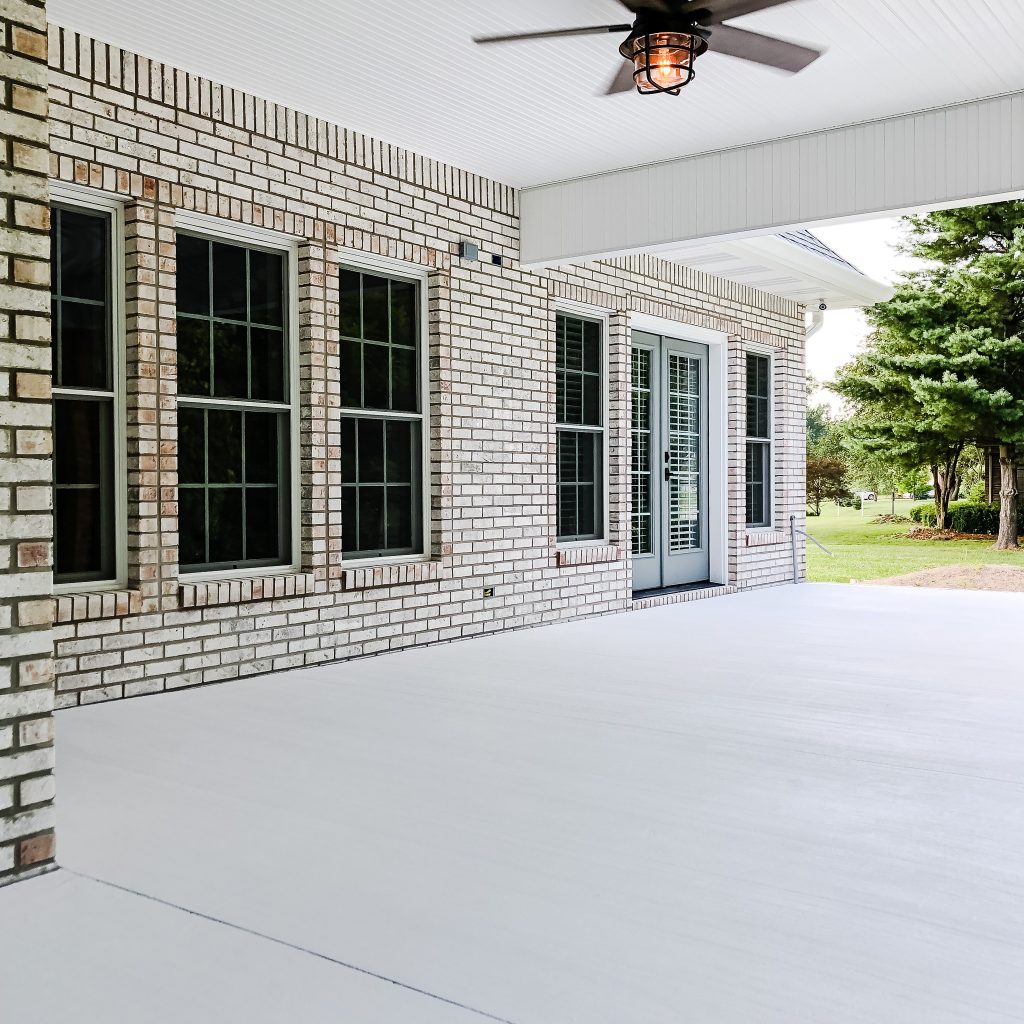
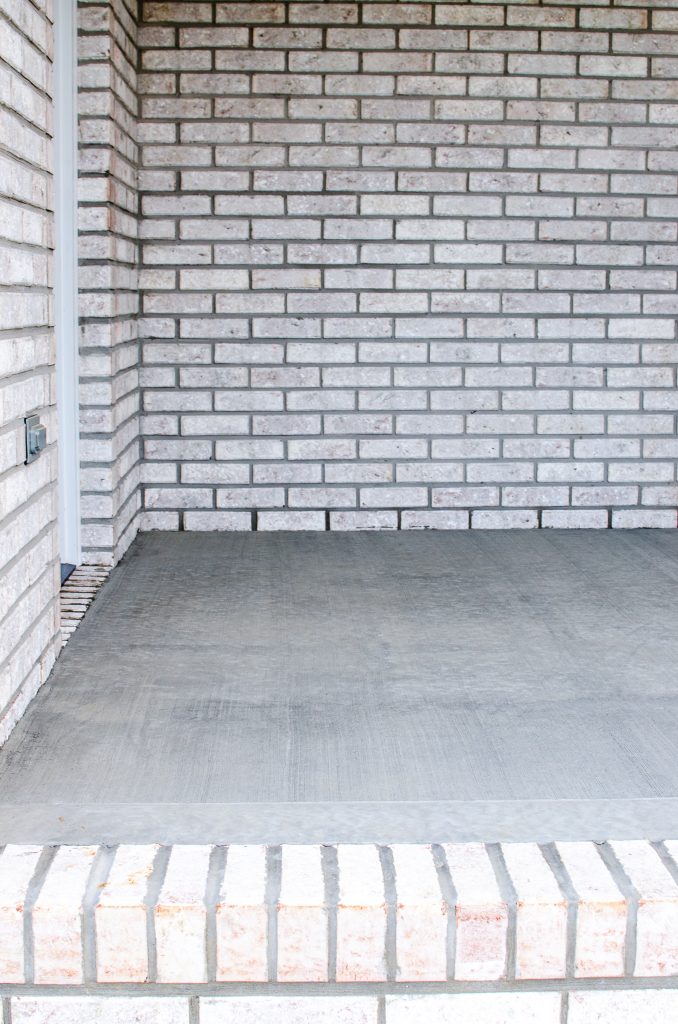
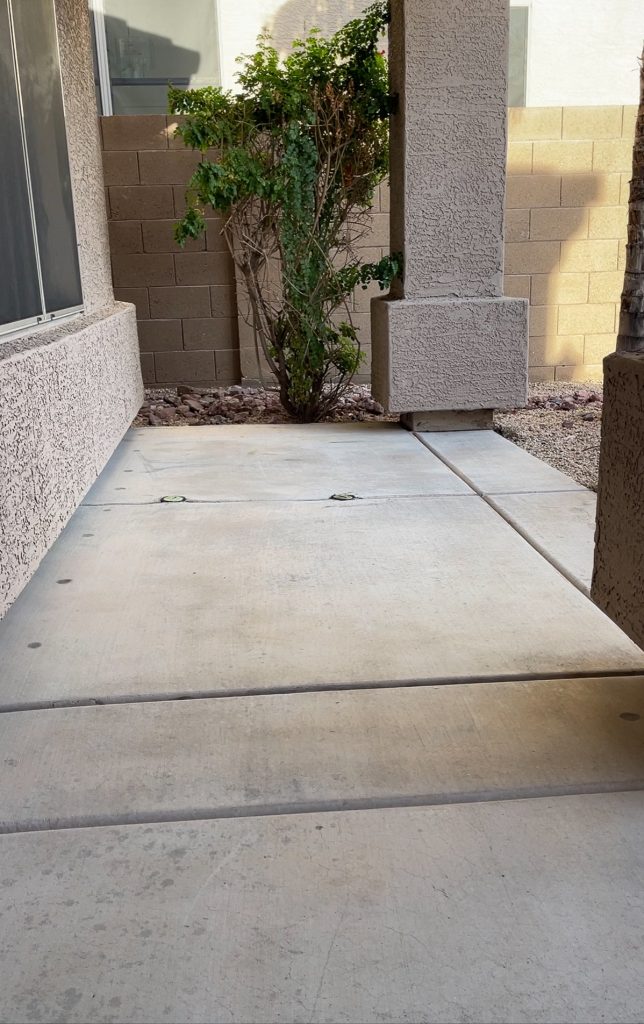
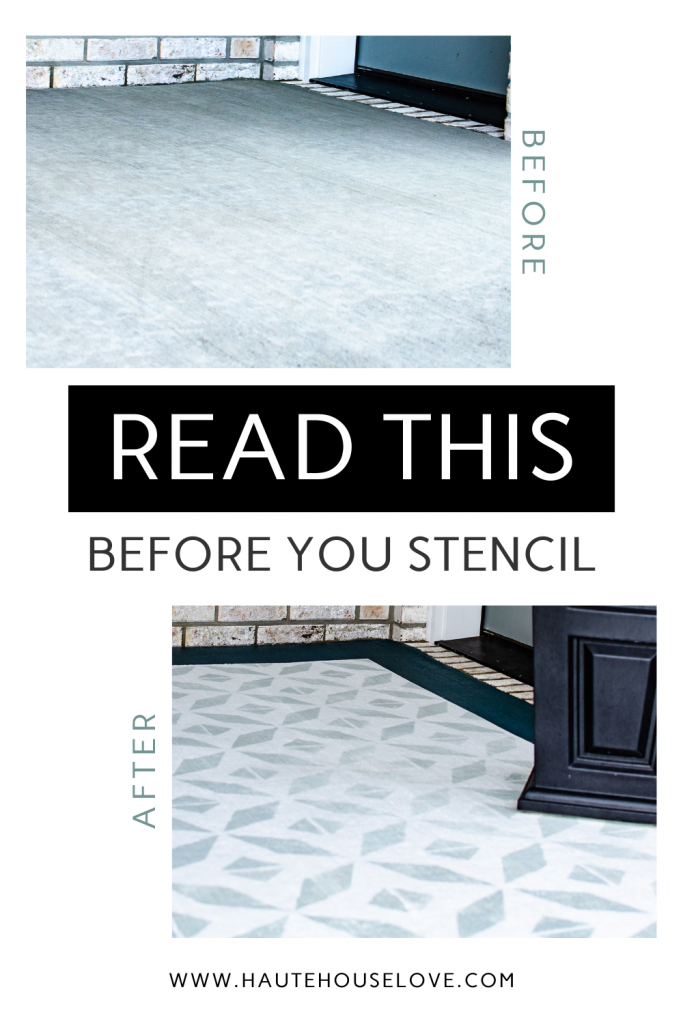
The before
How do you prepare a concrete porch for painting?
Clean The Concrete
In order to prepare for painting a concrete porch, the first thing you need to do should be fairly obvious, but you will need to clear everything off your porch! All of the furniture and decor needs to go. Once the porch is clear, it’s time to do a deep clean.
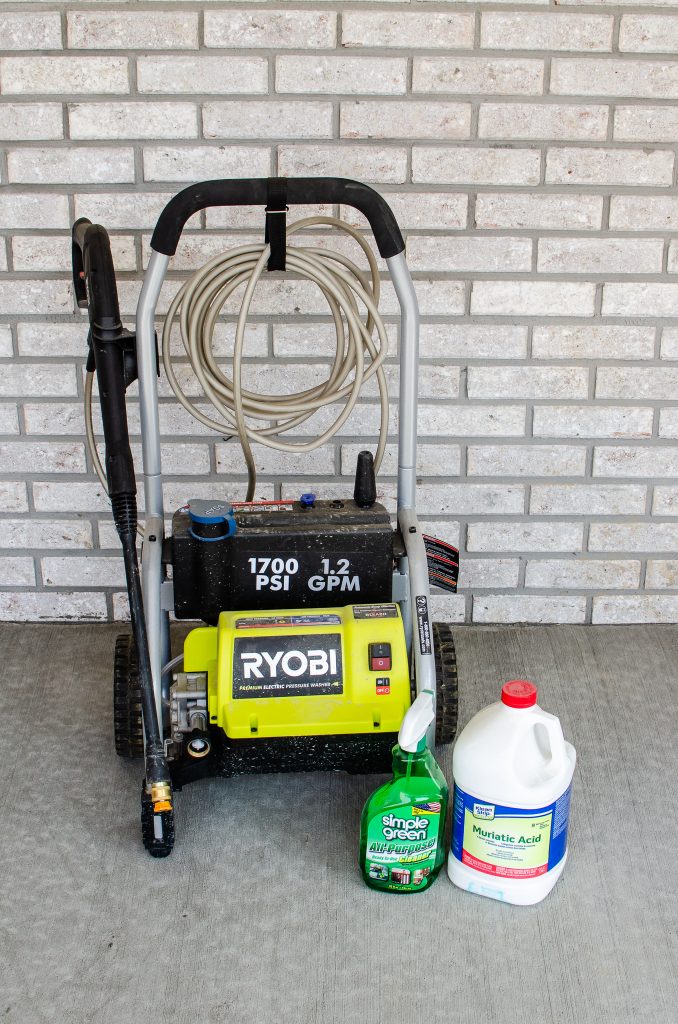
I did the deep clean as a three-step process with a PRESSURE WASHER.
I started with a basic spray to ensure all debris was washed away. Next, I went back over the concrete much closer for a more aggressive power wash. Finally, I went over the concrete porch a third time with a detergent that was designed to go into my pressure washer – you’ll want to use soap or degreaser here.
If your pressure washer is not designed to add cleaner, you can use SIMPLE GREEN and a hard bristle brush and scrub the concrete really well.
Etch The Concrete
After the deep clean, it’s time to etch the concrete.
For this step, I used a chemical called MURIATIC ACID. Muriatic acid seeps into the pores of the concrete to help fill in the pores, so that the concrete does not suck up as much paint and allows the primer to stick to the concrete better.
Muriatic acid is a very powerful chemical and needs to be used with extreme caution and proper safety equipment.
I used splash-proof goggles, a mask, gloves, and rain boots to protect my skin. In order to apply the chemicals to the concrete, I used a basic sprayer (like the ones you find for spraying weed killer or insecticide in your yard).
It’s important to note that you NEVER want to mix water into the acid. Add water to the spray container first. THEN add the acid.
Use only a plastic container to mix the water/acid together, then stir with a wooden spoon. DO NOT USE METAL.
To add the muriatic acid, follow the instructions on the bottle to add it to water in the plastic sprayer. Then spray it over the concrete patio and let it sit for five to 10 minutes. After the acid sits, rinse it off gently with water from a normal hose. No spray attachment is needed.

Do I need to prime concrete before painting?
I started each day of this project by cleaning up debris from the porch that was collected overnight. I used a leaf blower, but you can also simply sweep away any debris with a clean broom.
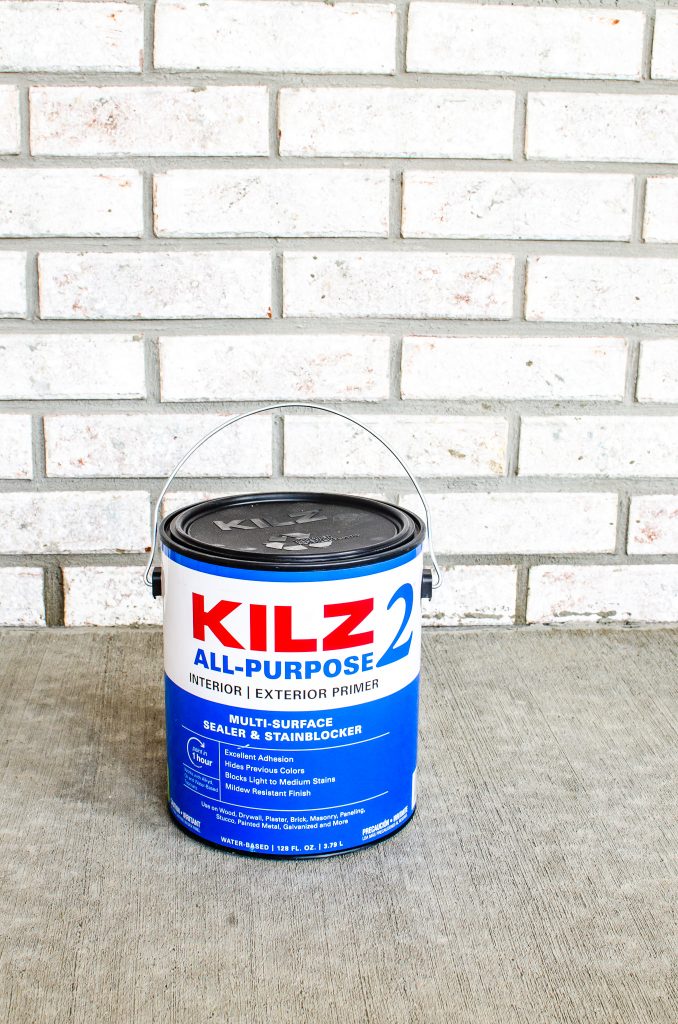
When it comes to priming the concrete, there are a lot of options. A CONCRETE & MASONRY SPECIFIC PRIMER is typically the best. Since I already had KILZ2 INTERIOR/EXTERIOR grade multi-purpose primer laying around my house, I opted for that. This primer works for everything!
I used a small brush, to do a loose cut-in around the edges of the porch and then used a paint roller for the rest of the porch, working from the back of the porch towards the outside. This may seem obvious, but be sure that you don’t paint yourself into a corner with no way to step off the porch!
After one coat of primer, you will want to let it dry and cure for 24 hours.
This particular primer gave amazing coverage on my porch. So much so that I skipped the second coat of primer and jumped right into the topcoat.
If your primer seems to have seeped into the concrete more than you expected or does not seem to be very evenly coated, consider another layer of primer and another 24 hours to cure.
2022 UPDATE: If you live in a dry/desert climate, I have found it best to use a BONDING PRIMER since the concrete will likely become dusty after the cleaning/etching process. You can also revert to THIS PRIMER if you are concerned about stains on your concrete from age/wear.
What kind of paint do you use on a concrete porch?
Once again, you will want to start this step of the project by blowing off any debris from the porch (or use a clean broom to sweep debris away).
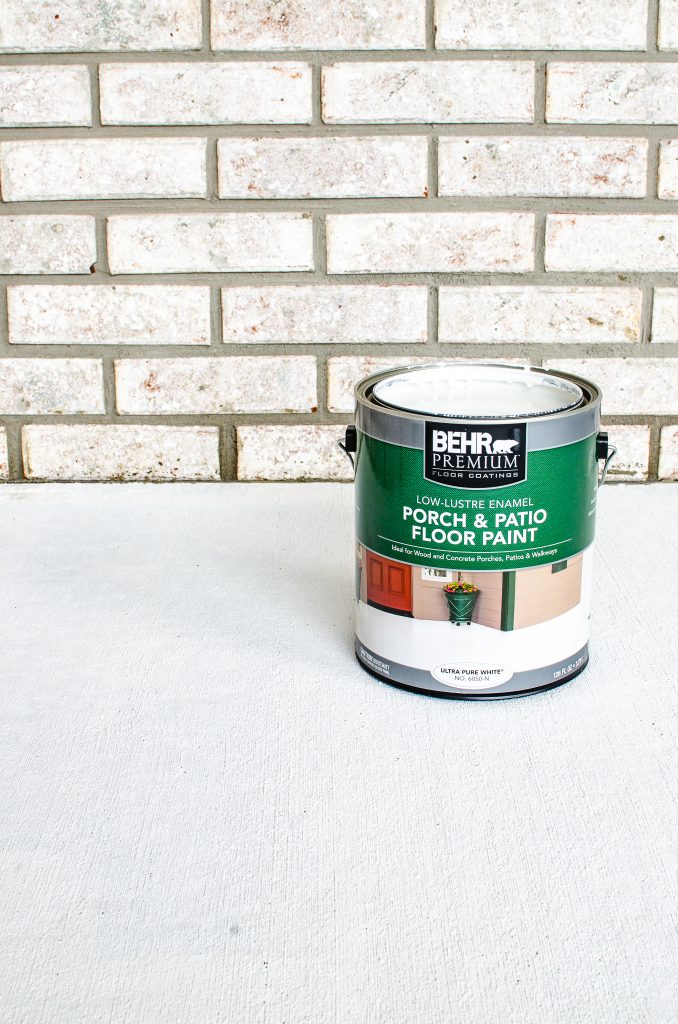
For my porch paint color, I used PORCH AND PATIO FLOOR PAINT ENAMEL in the color Snowbound by Sherwin Williams.
To apply this first coat of color, use the same process as with the primer by first cutting in around the edges with a small brush and then using a paint roller to cover the full surface of the porch.
Once this base coat of color has been applied, you will want to wait another 24 hours to allow the paint to cure and completely dry.
Repeat this step the following day.
Can you stencil a concrete porch?
Absolutely! Using a stencil on your painted concrete porch is a great way to give it some character. It adds a little something extra and is a fairly easy process. All you need is a stencil, painter’s tape, and a foam roller!
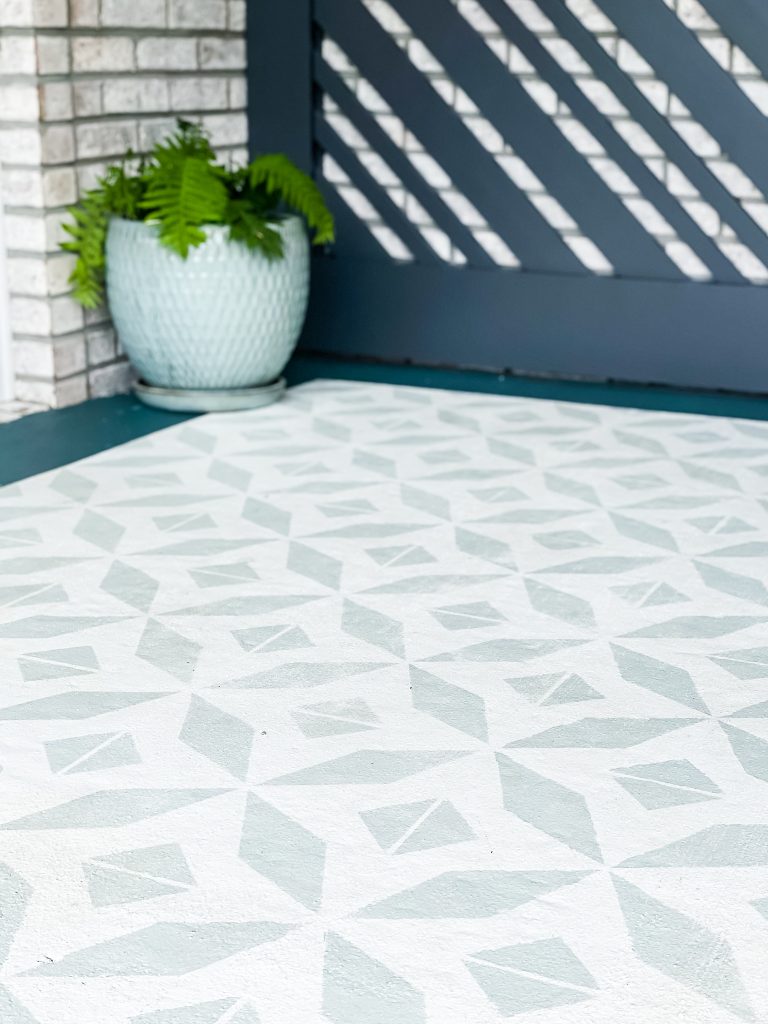
I wanted to add an extra pop to my painted concrete porch, so I decided to use a stencil from Cutting Edge Stencils to apply a tile pattern. I have worked with Cutting Edge Stencils on several other projects in my home, but I’ve never used a tile stencil before. I was excited to try something new!
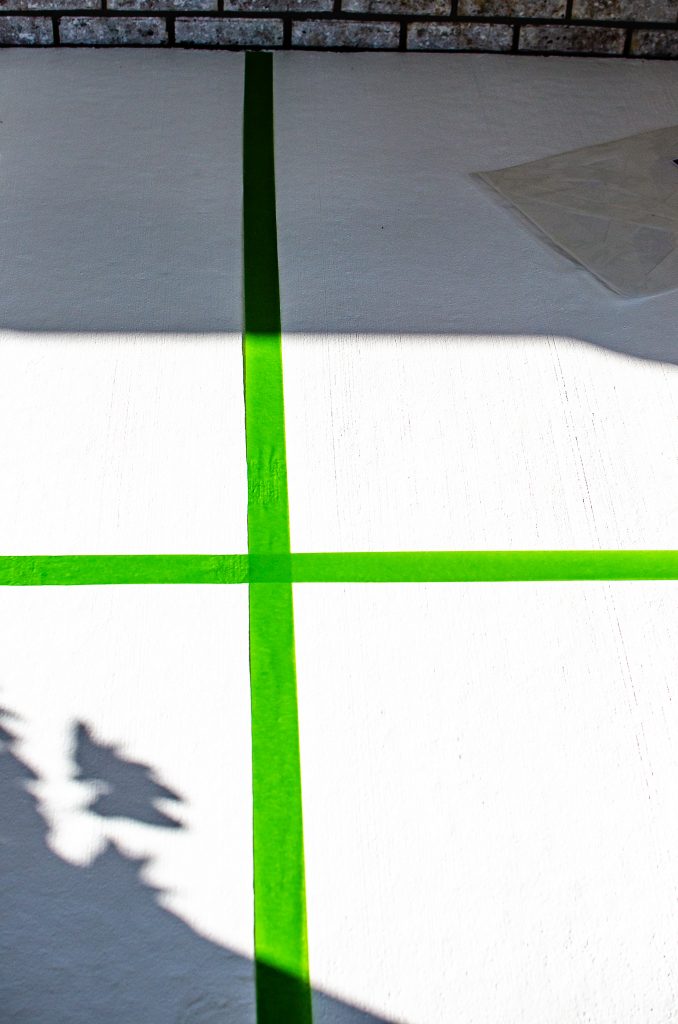
Using Frog Tape and a measuring tape, I taped off the center of my porch and then placed the stencil directly over the middle of that center spot.
Next, I added Frog Tape on each of the top corners of the stencil to make sure that it didn’t move when painting. This allowed me to stay on the center point of the porch when I start painting.
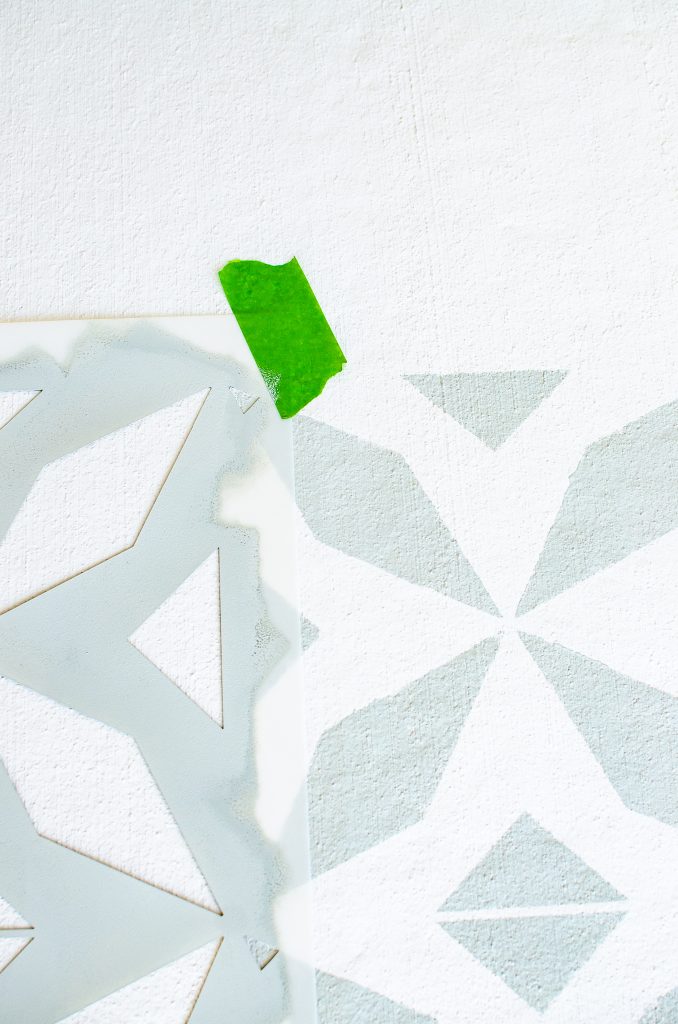
It’s important to use light pressure and a minimal amount of paint when stenciling to avoid bleeding through. However, because of the nature of concrete, some bleed-through is to be expected.
If you decide to add this step, this is the best time to embrace all of the little imperfections that will inevitably happen along the way. Consider it character!
When one area has been stenciled, pick up the stencil and place it next to the area that you have already painted and repeat the process.
Stencil Color: Sherwin Williams Silver Strand

In the 11th hour of the project, I decided to add one more feature: a dark border around the porch to give the appearance of a faux rug!
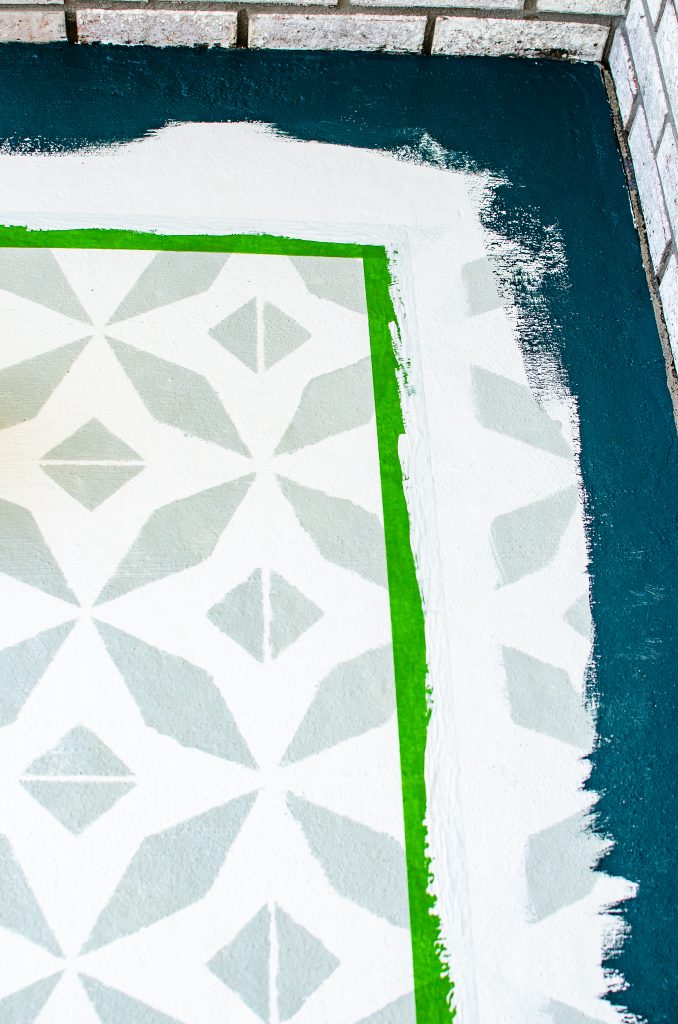
I did this by using FROGTAPE to create the border, then painting over the edge with the base color to seal the tape.
Once the base color had time to cure, I went around the stencil with the new color.
Border Color: Sherwin Williams Still Water
You may also want to read: How to Paint a Room – 5 Must-Know Tips
DO I NEED TO SEAL A CONCRETE PORCH AFTER PAINTING?
Some say, yes, you do need to seal a painted concrete porch, and some say no. I painted two concrete porches at my house, and one is sealed, and the other is not. Both porches have held up great over time and honestly, I only see one pro/con difference between them.
The pro to sealing is that it is slightly easier to clean dirt and stains. Without the extra layer of protection, cleaning takes a little more elbow grease, but it’s not impossible.
The con to sealing is that it makes the porch slightly more slippery when wet. Not a huge deal for me personally, because my porches are (mostly) covered but definitely something to keep in mind if your concrete is more exposed.
If your porch is in an uncovered area where it will be exposed to all of the elements I would suggest erring on the side of caution and sealing the porch. Otherwise, the choice is completely up to you!
On the porch that I did seal, I used CONCRETE & MASONRY PROTECTOR & WATERPROOFER by BEHR.
Whether you seal your painted concrete porch or not, I would recommend waiting 48 to 72 hours after the last treatment before bringing furniture/decor back on the newly painted surface.
THE AFTER

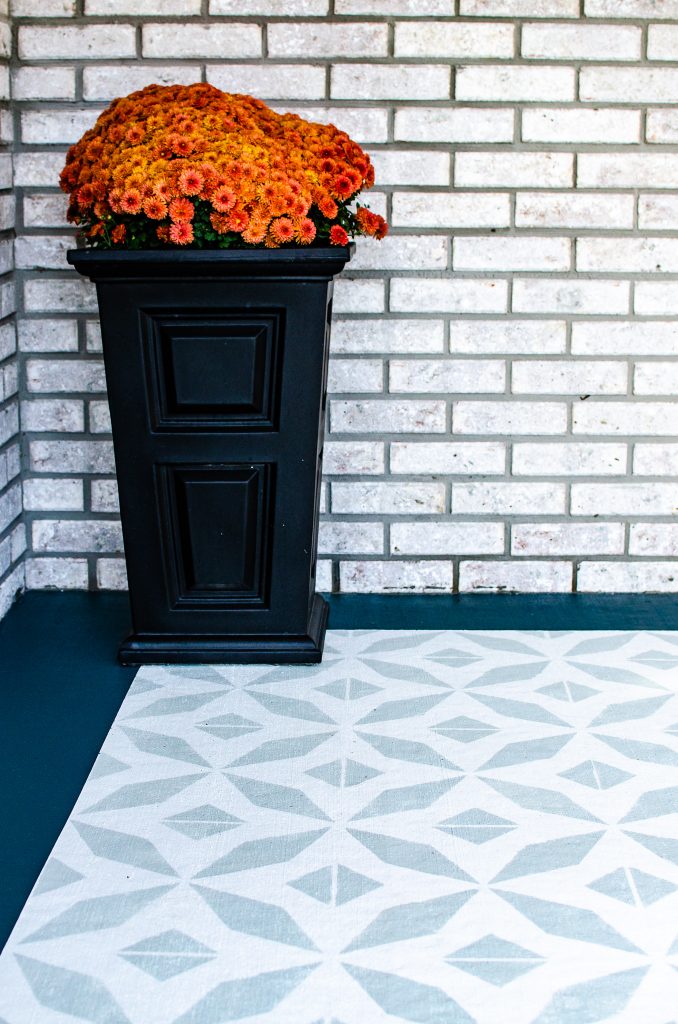

I’m so happy with how this porch turned out! It has so much personality, and the best part is that I took the time to DO IT RIGHT!
The 2020 porch ONE YEAR LATER
FAQ’s
what if my porch is tacky after using the sealant?
If you find that the concrete is a bit tacky after the cure time, there may have been too much sealant applied to the area. (I have found with practice that there is a fine line.Í›)
Simply hose the porch off and use a large squeegee to remove the excess water & sealant. This may take a few times to get the tackiness to fully go away but it will subside over time.
What is the best way to clean/care for painted concrete?
A power washer on a low spray setting or a wet vacuum LIKE THIS ONE is what I’ve found best for keeping my painted porches clean/maintained.
Generally, I will deep clean twice a year (spring and fall) with a power washer on a low spray setting. Then, I use the wet vacuum with a small amount of cleaner for in between maintenance.
can I paint a concrete porch that has already been painted?
YES! You absolutely can! Follow all of the steps in this tutorial making sure to remove any loose paint in the power washing step.
The only change I would recommend is the primer you use. USE THIS PRIMER for the best results. Then, continue with the steps as listed.
What is the best paint color to use on a concrete porch?
When painting a concrete porch I would highly recommend pulling colors from the structure that the porch surrounds for the most cohesive look.
Use the recommended paint brand, then have them tint it to the color of your choice!
Have a gray and White House? Use a similar shade of gray and white. Have a home with warm taupes and tans? Use a base of a creamy white and an accent of the house color. Want your porch to look like a rug? Bring in a pop of color for the border like I did in my 2020 porch.
Overall, the choice is yours! Your home should be a reflection of your style, so choose colors that make you happy!
painted concrete porch before & afters
2019 Back Porch (former IN home)
Paint Colors: SW Snowbound & SW Silver Strand
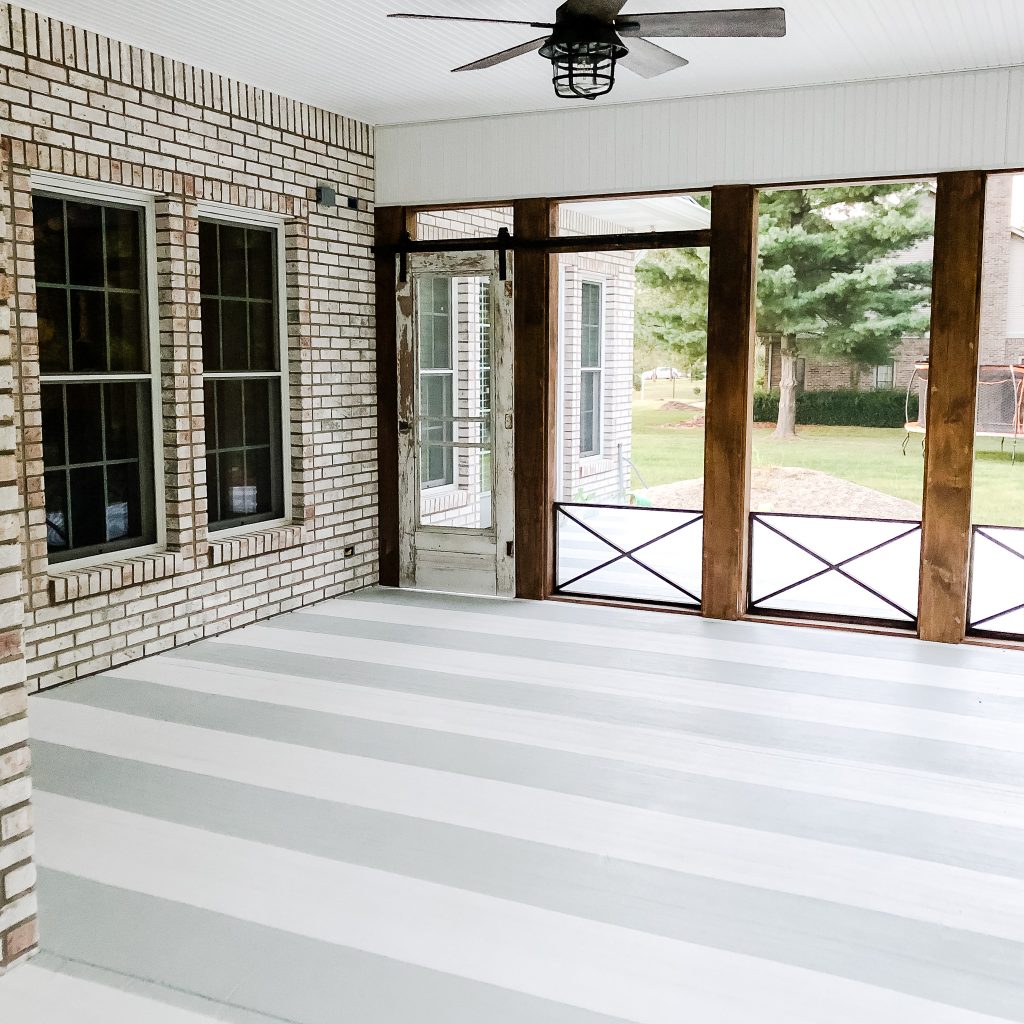
2020 Side Porch (former IN home)

Paint Colors: SW Snowbound, SW Silver Strand & SW Still Water
2022 update: I PAINTED ANOTHER CONCRETE PORCH!
We made a big life change in the summer of 2022 and moved our family to Arizona! You can read more about it HERE!
One project I tackled within the first few months was painting our front porch!
The only thing I changed in this warm-dry-desert climate is the PRIMER I used.
2022 Front Porch (New AZ Home)
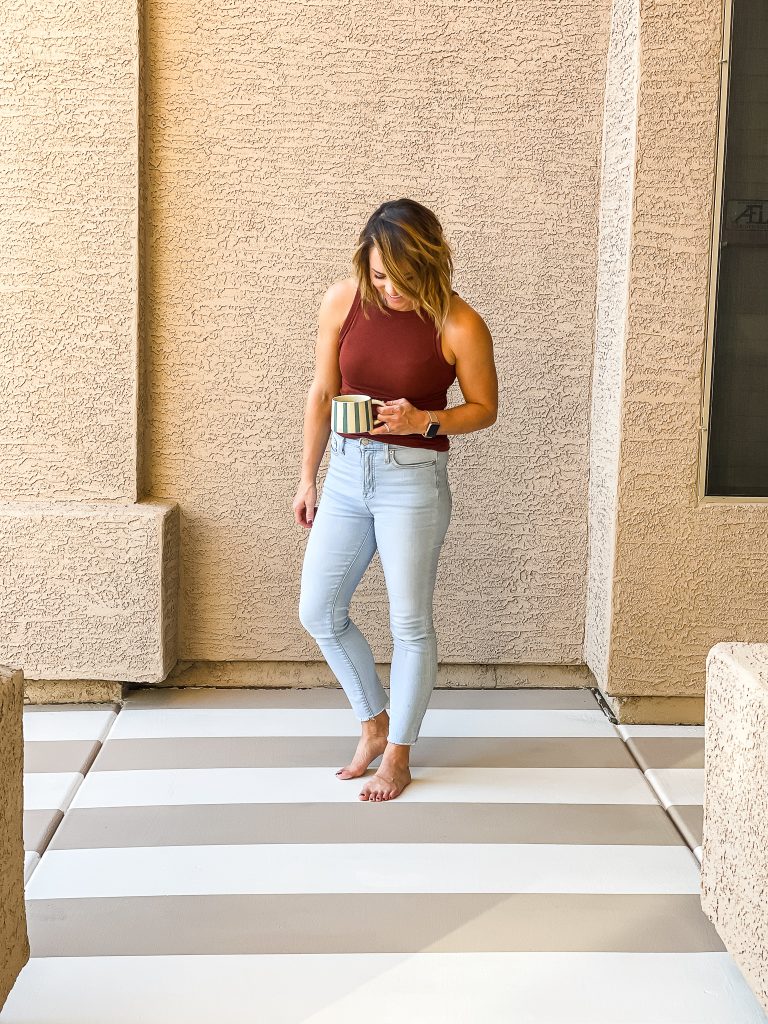
Paint Colors: SW Windfresh White & A custom color match to our current exterior body
If the painted concrete porch project has inspired you, I would love to hear about it! Make sure to follow along on INSTAGRAM for more project ideas with a unique twist.

shop this project:
SHARE ON PINTEREST:
shop the post
The Comments
Ashley
Hey we just moved into a house and the porch is already painted but I would like to repaint it a different color. Are there different steps I need to take?
Darnell
Thanks
This was sooo inspiring
I want to do my pebble walk way in the back. I cleaned the concrete with multiple washes with bleach. I also would like to do my front steps as well.
I will keep you posted.
This was inspiring 👏
Karina
Hello,
You’ve inspired me to paint my patio and I am in love with how it came out. I use the same stencil and followed the steps that you provided. I was wondering if your patio ended up with a tacky finish from using the Behr Protector and Waterproofer? I waited a week for it to cure and get better but it’s still tacky. Everything seems to stick to it where as before I applied it was a breeze to just sweep it. After I applied the behr protector and waterproofer if I sweep it or step on it with my shoes on, all of the debris and footprint sticks to it and it won’t come off unless I use a Clorox wipe and wipe it off with a bit of pressure or scrub it off. Is there another top coat you’d recommend to go over it to make it not sticky? Because water beads up on it, I’m wondering if there is a top coat that I can apply over it that won’t bead up and can stick to it permanently. I’m sad that it’s finished this way after all the stenciling work. Anything that could help will be so appreciated. Thank in advance! Karina
Sue
I love it, thanks for sharing!