How do you you display lego models at home? Try these DIY lego display shelves! A great beginner woodworking project with just a few tools.
I’m so excited because this week we tackled a brand new project in our Indiana house based on an element of the Kitchen Makeover that I gave the Arizona House a few weeks ago!
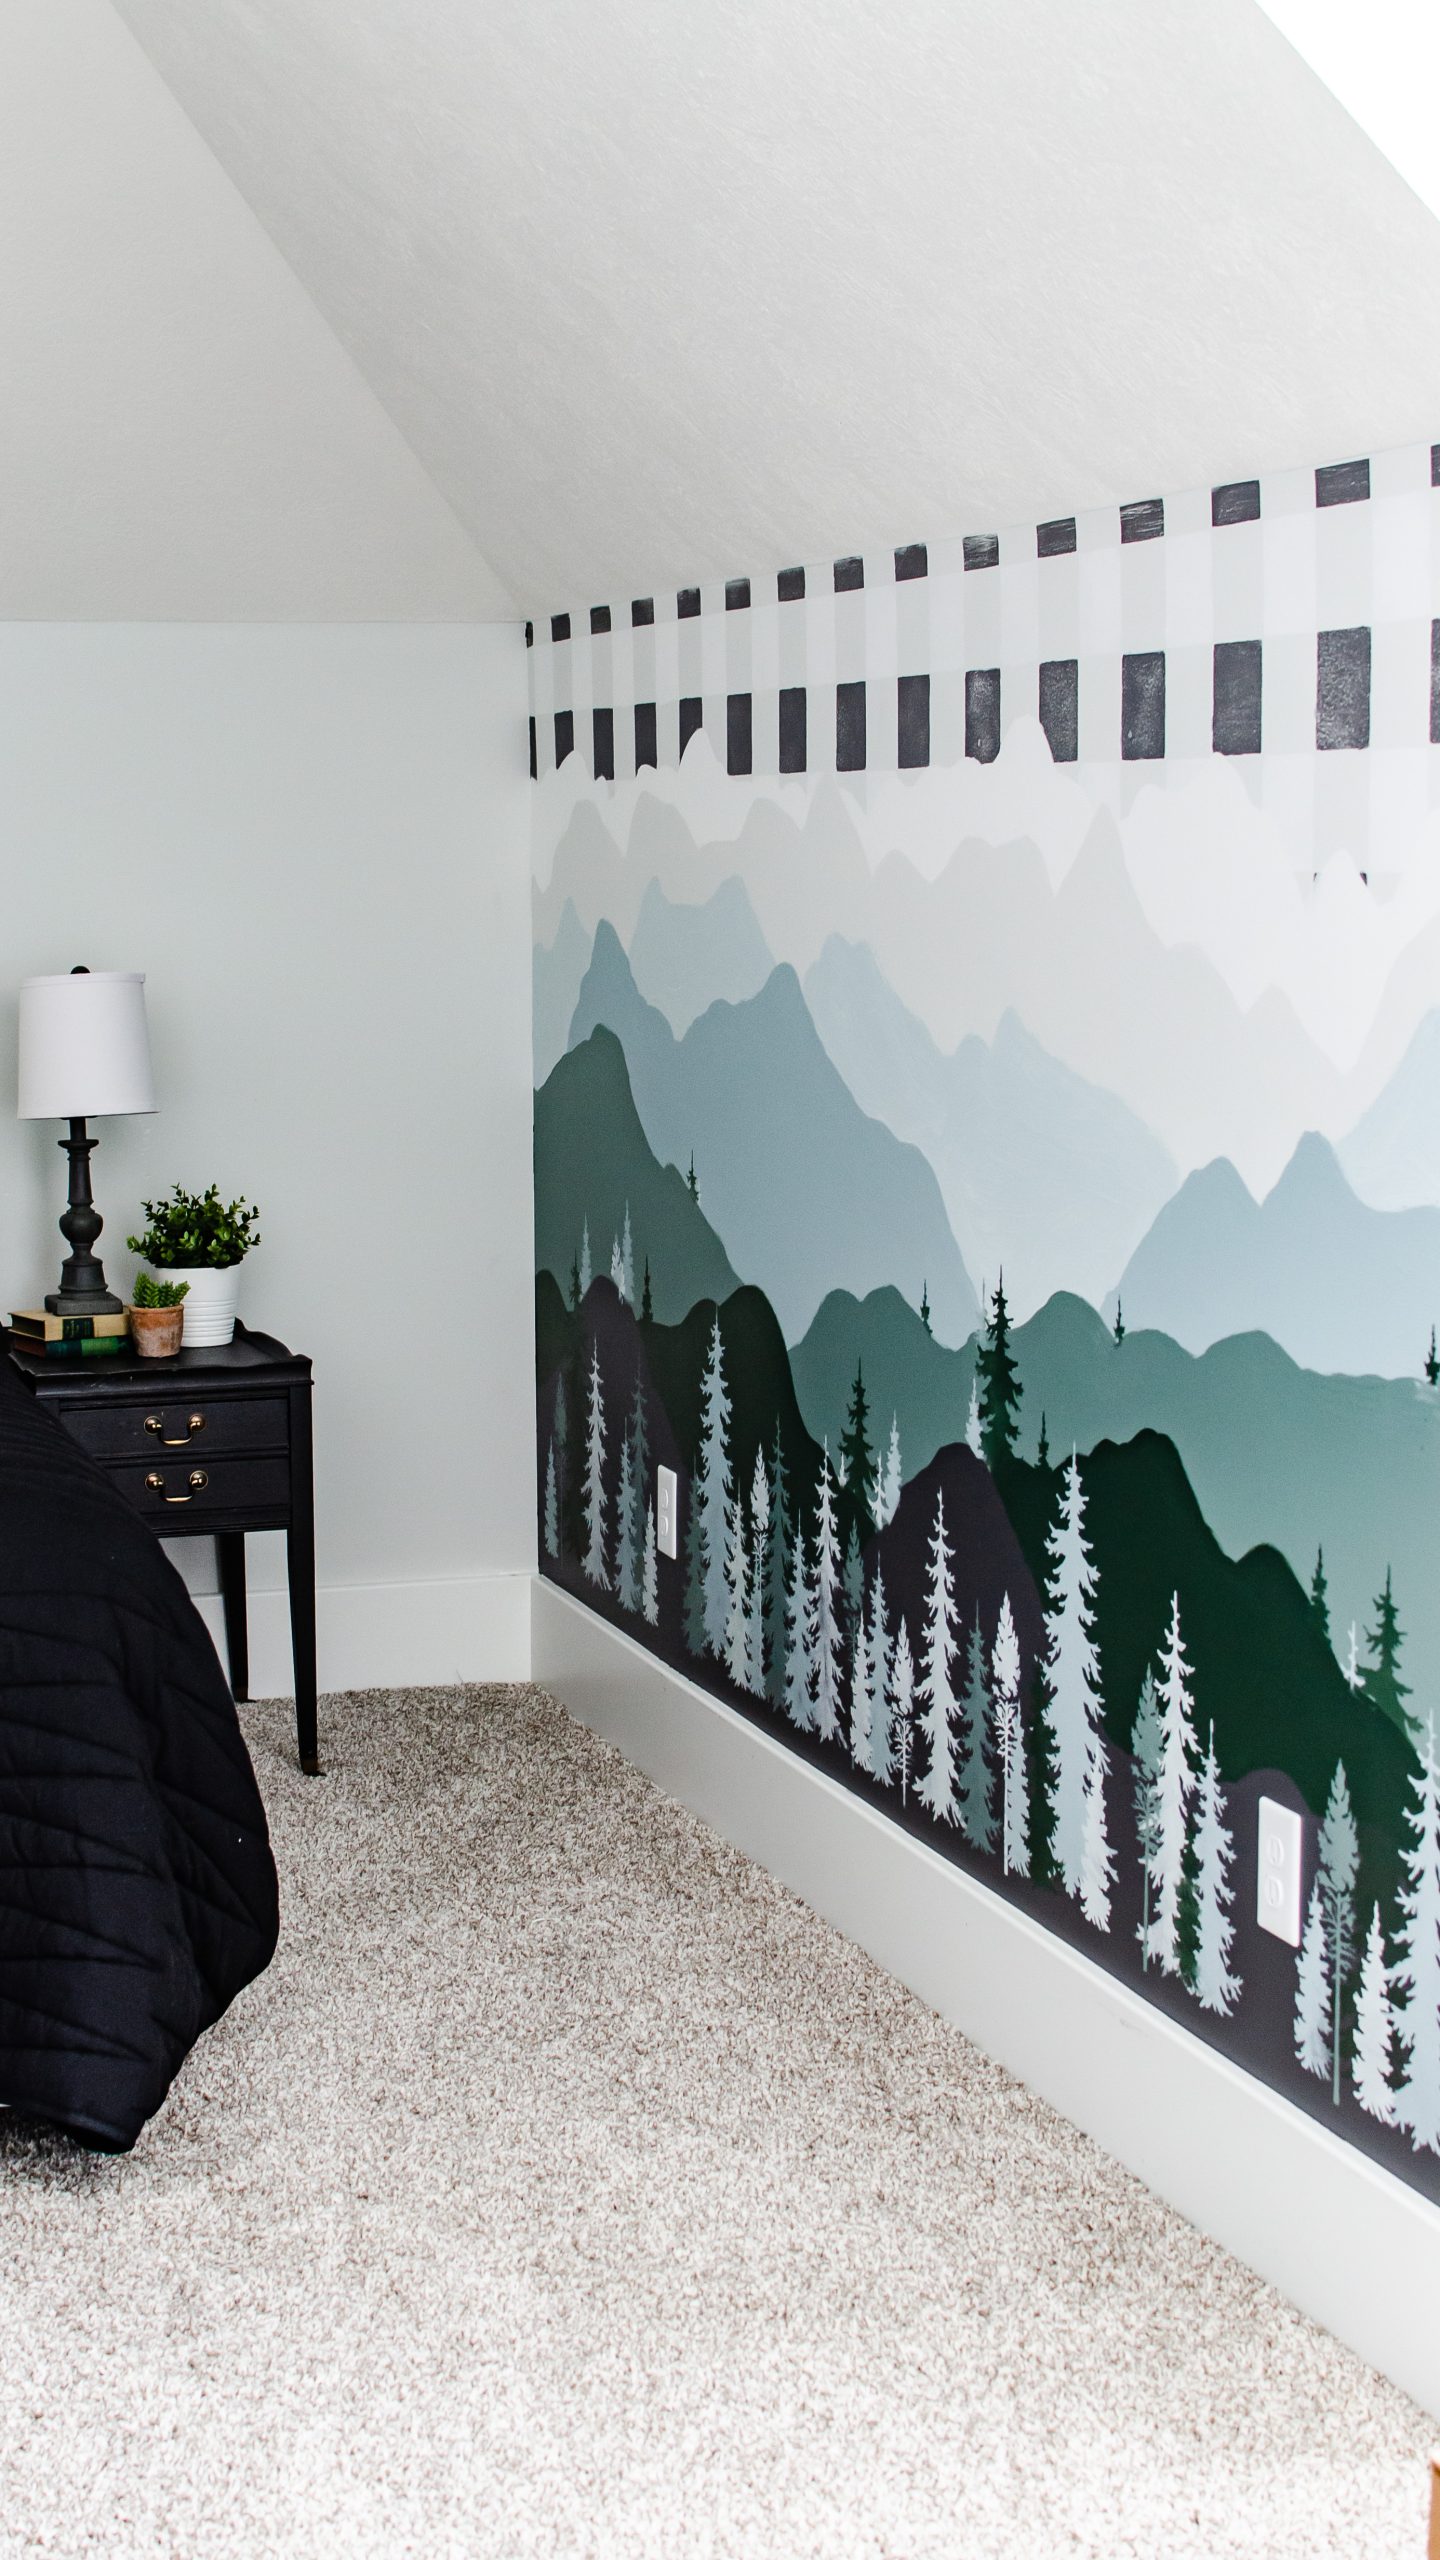
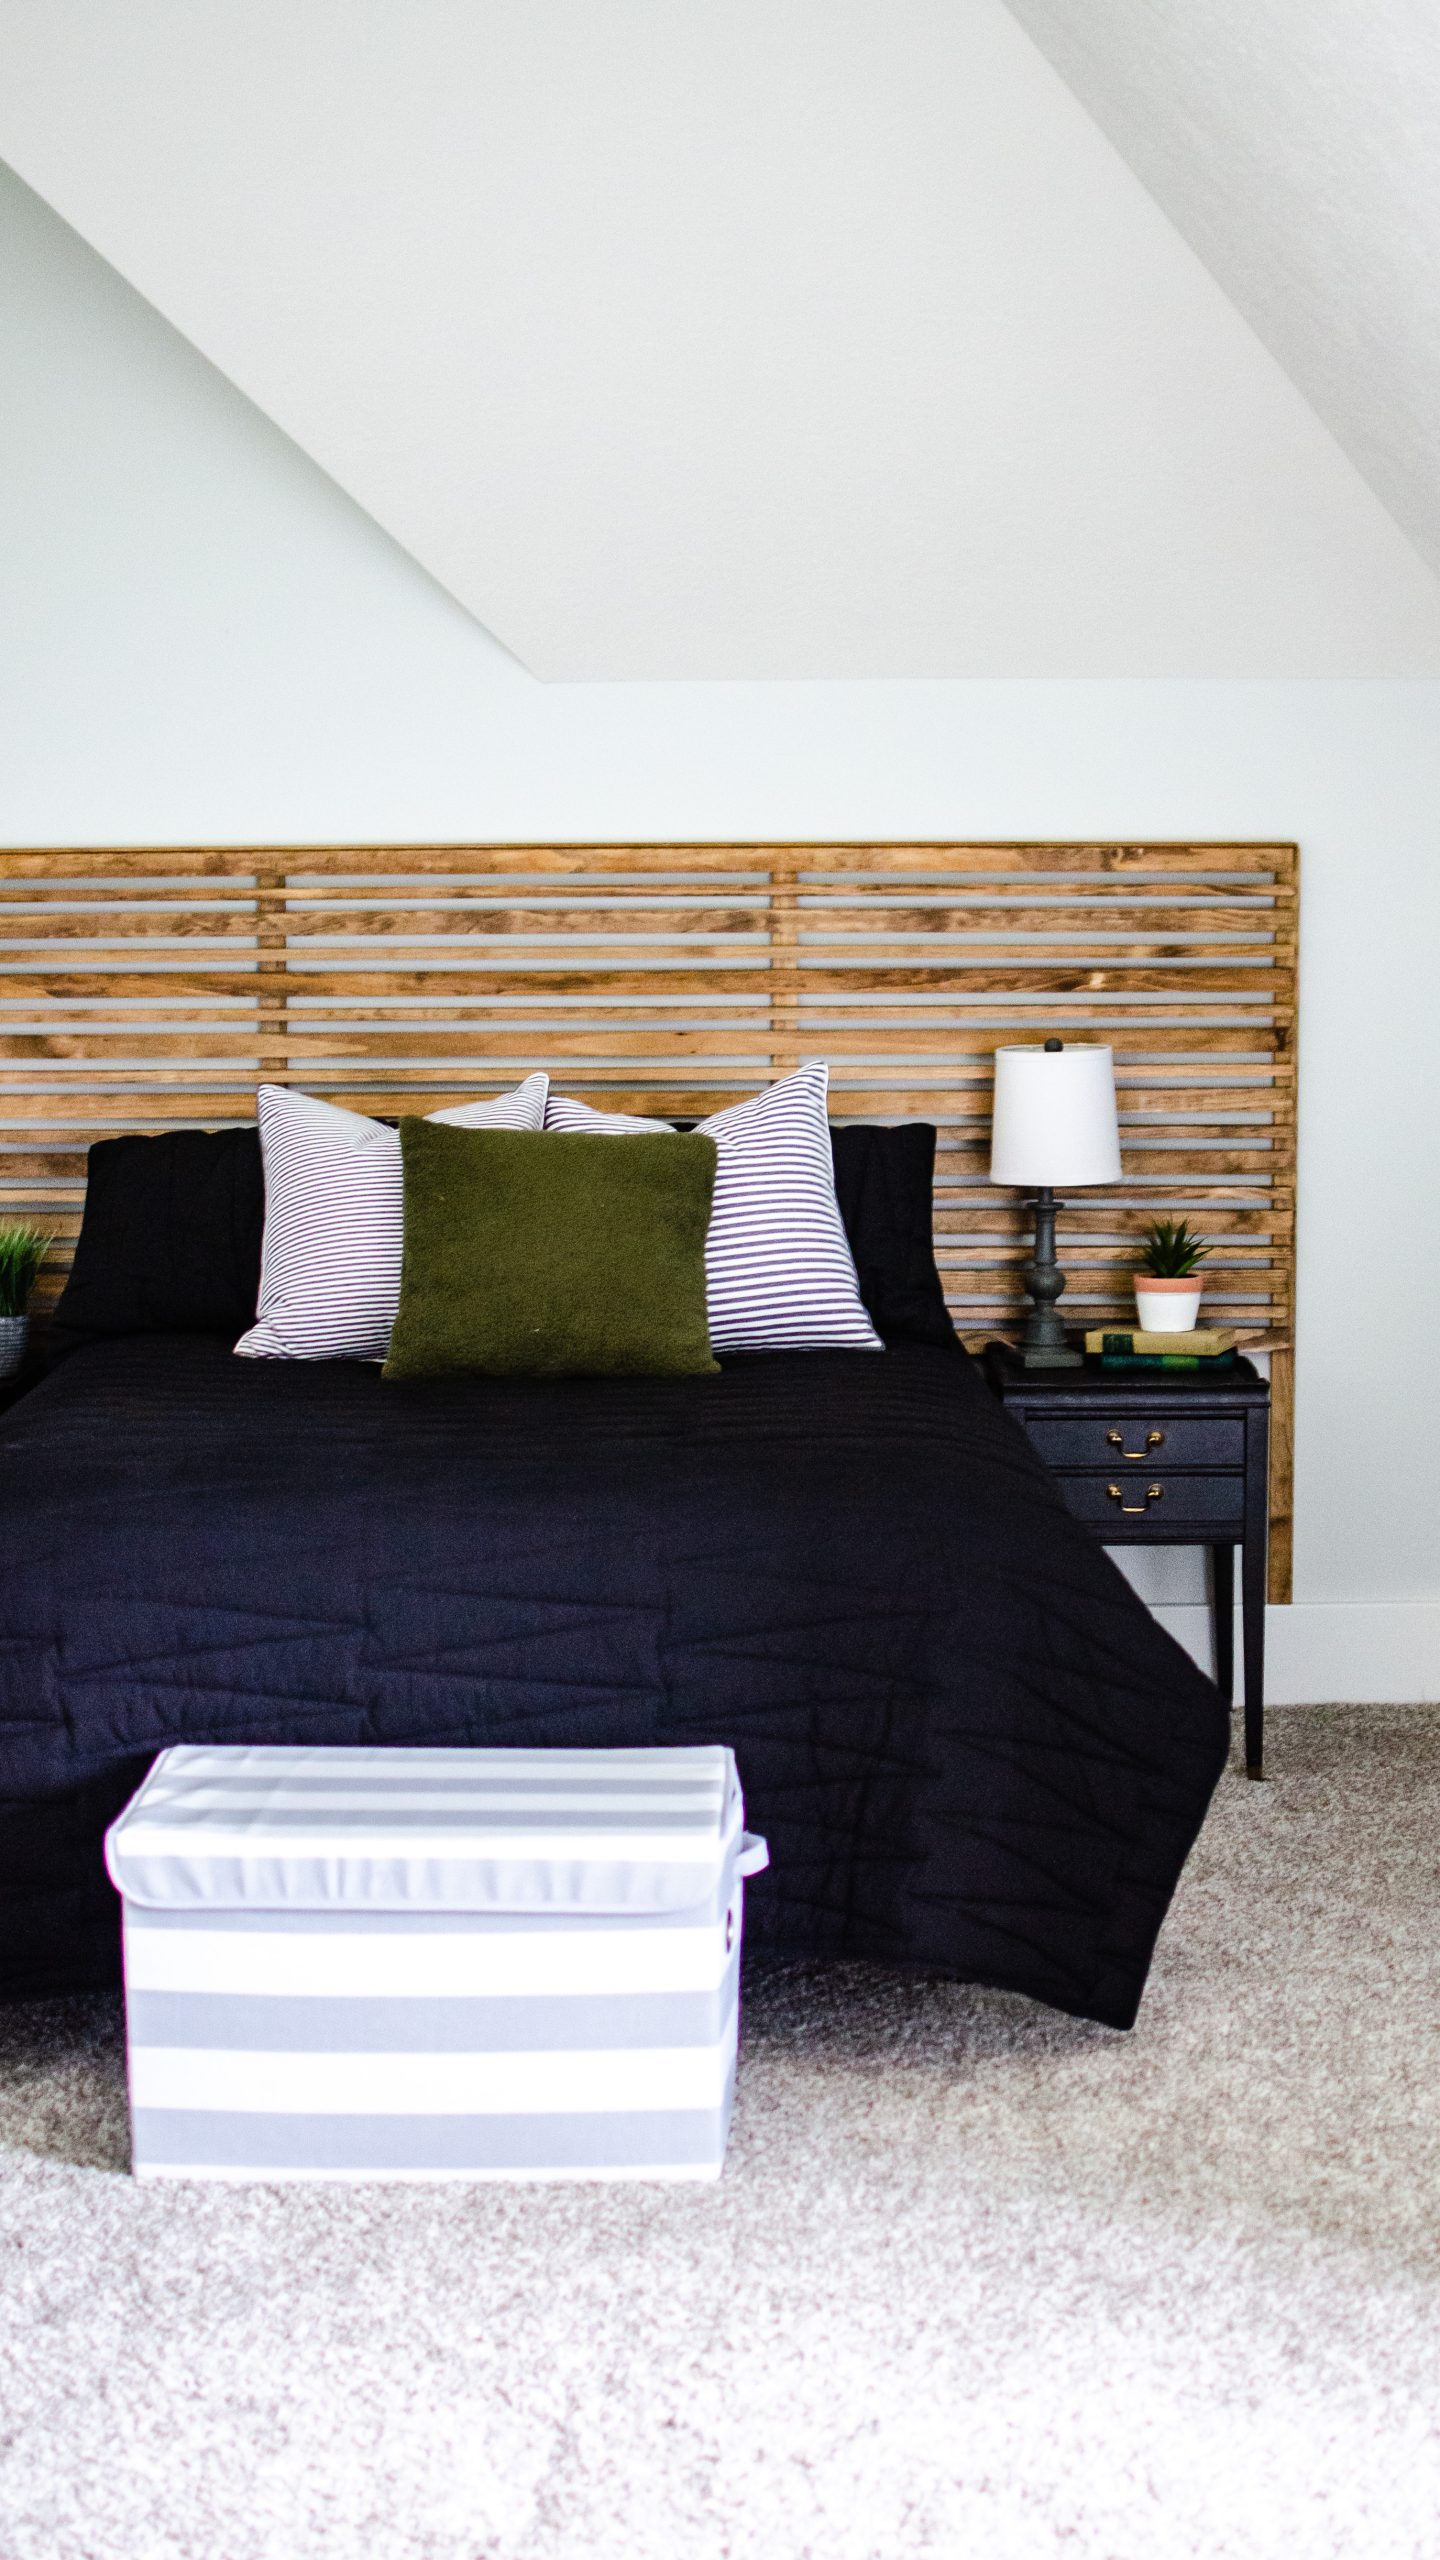
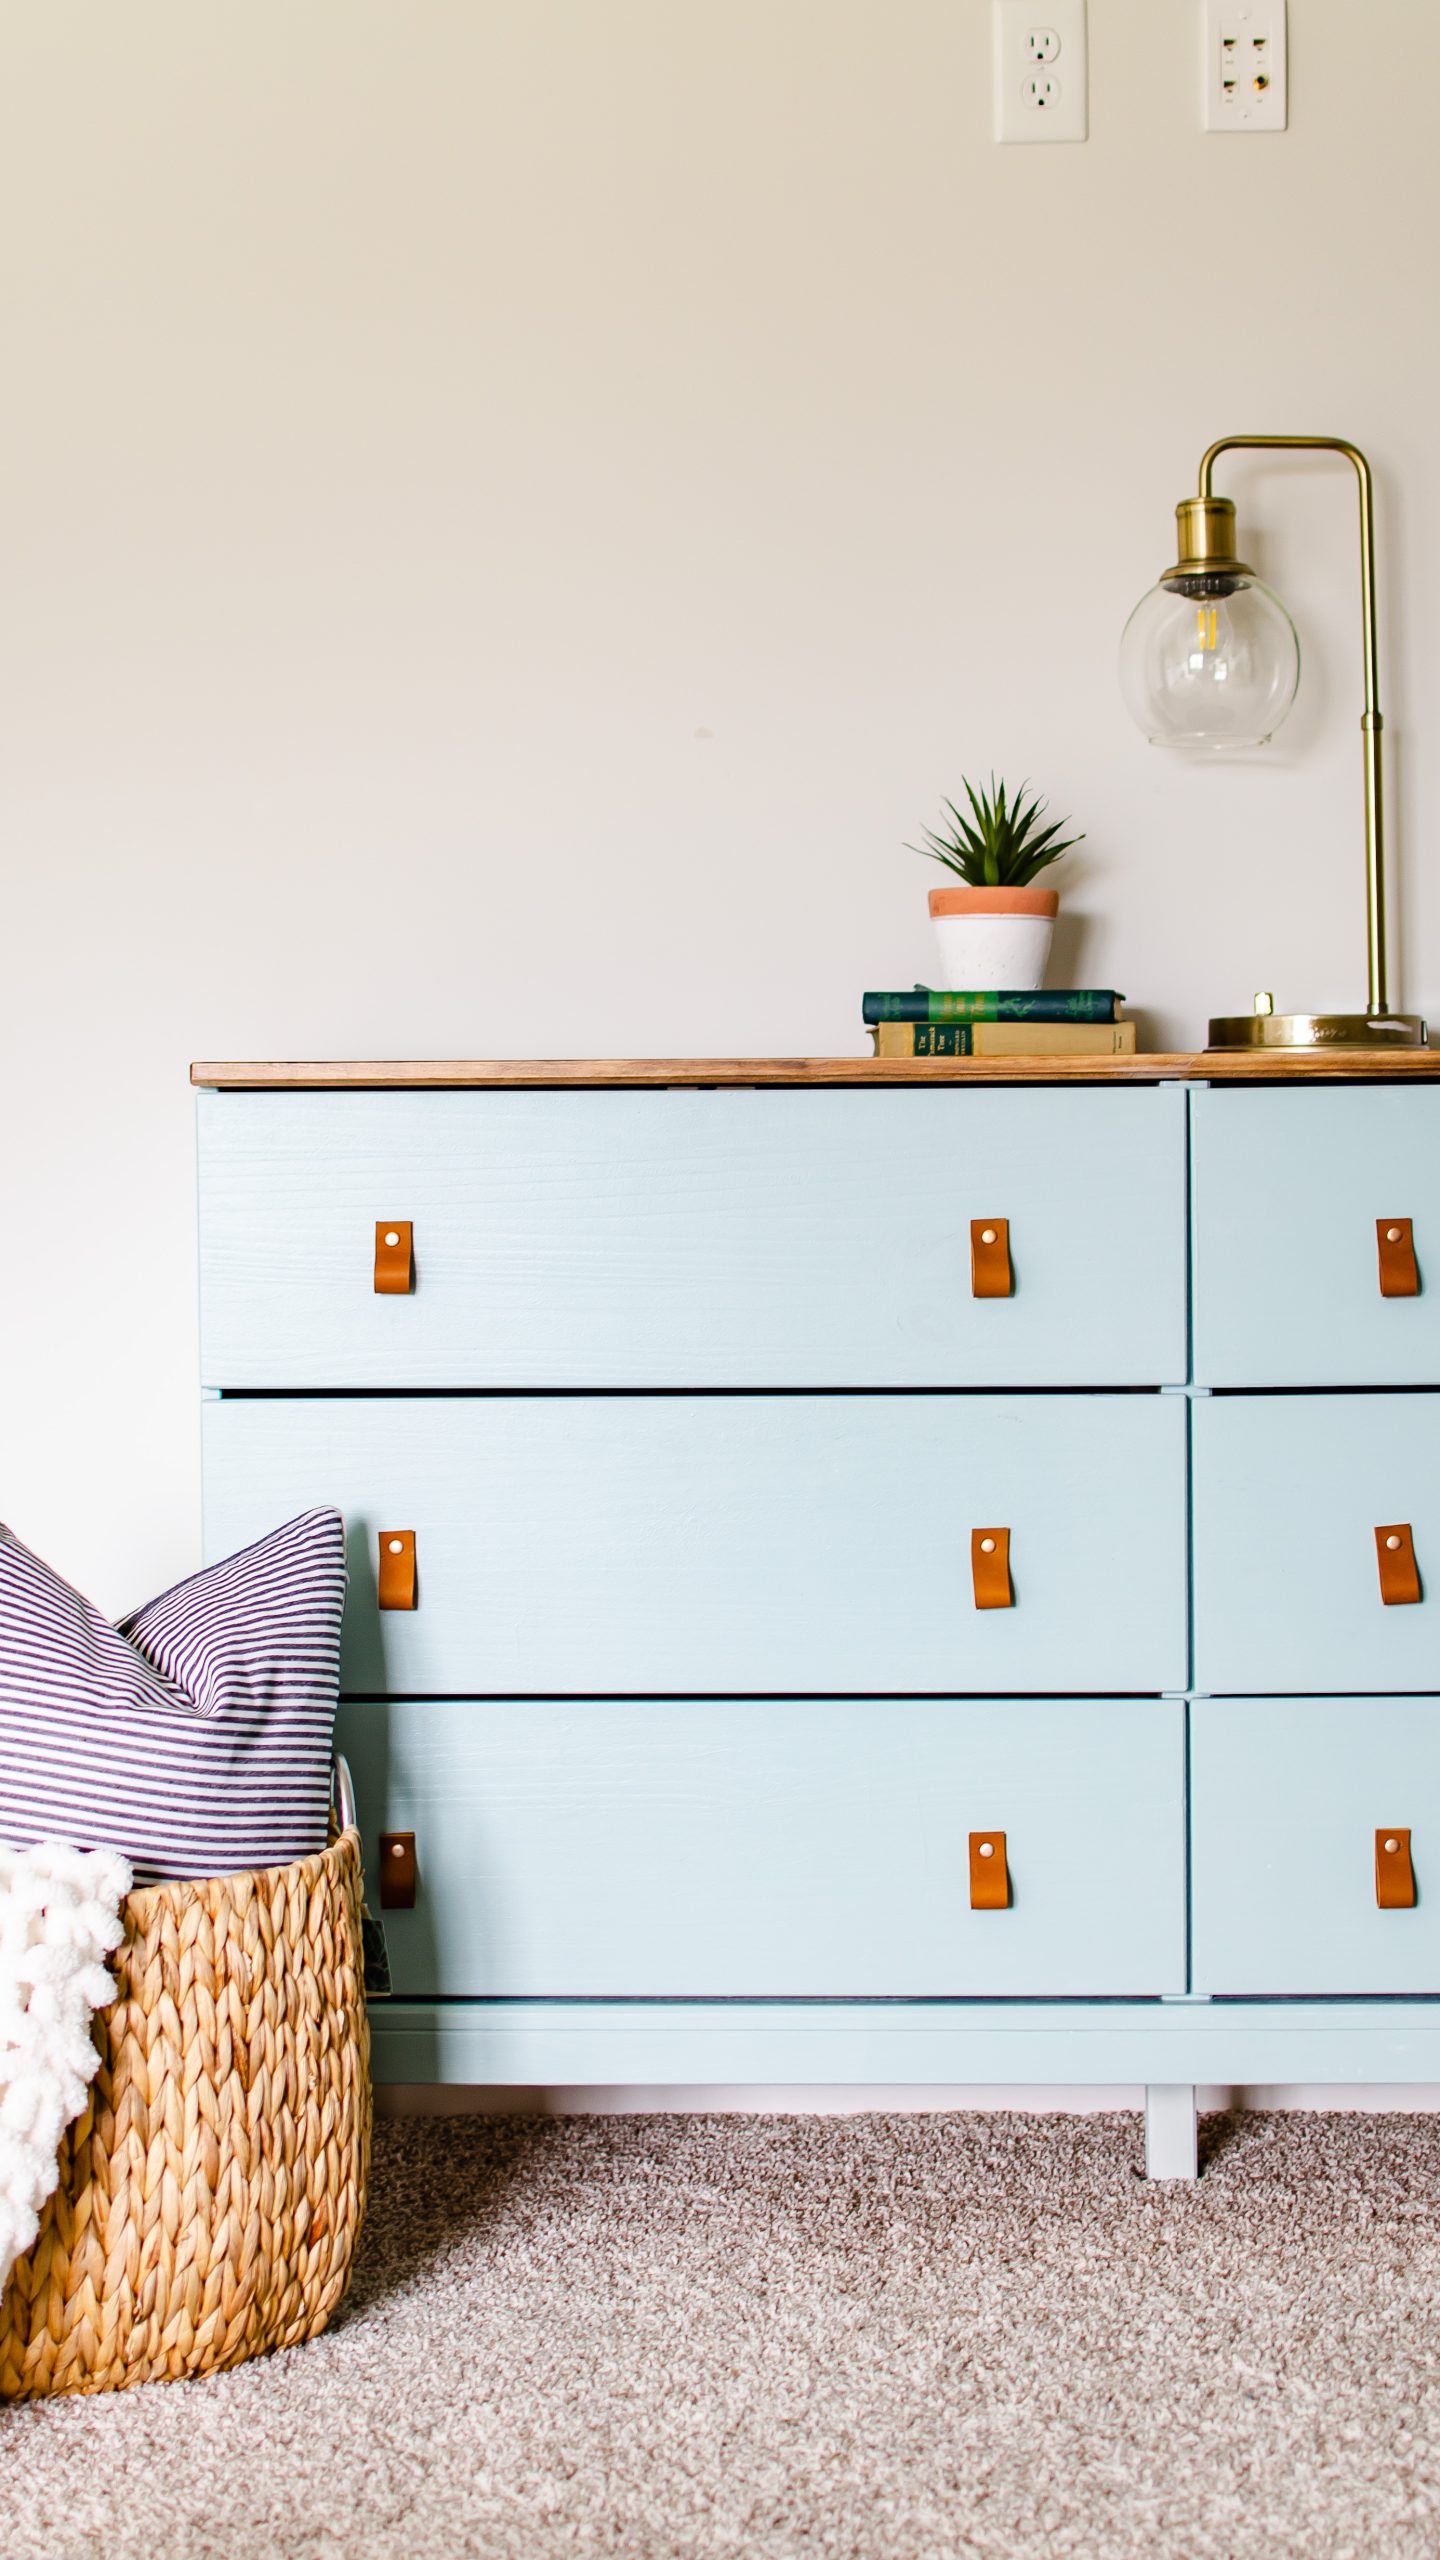
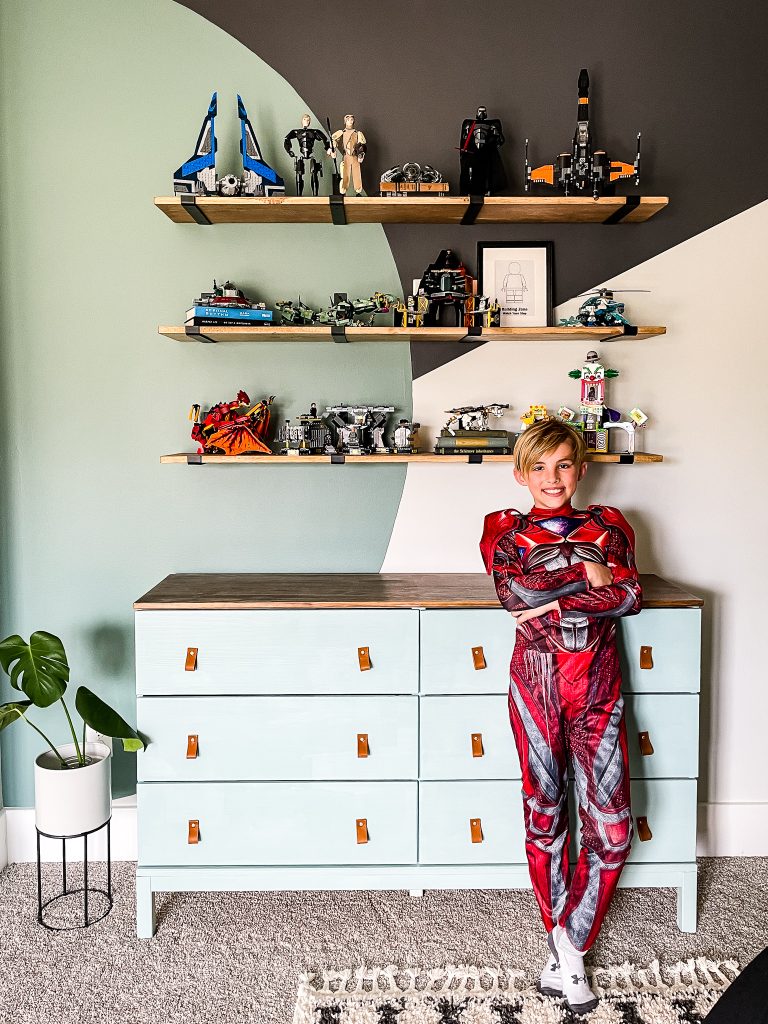
This time we jumped into my oldest son, Xander’s, room. We’ve done a few projects in this room in the past, like the Mountain Mural, Slat Wall Headboard, and DIY Leather Drawer Pulls.
Now its time to tackle the blank wall space behind the dresser!
This project involves all three of the things that I love so much about DIY and design. It has a purpose for your home, it involves a simple building project and, of course, we brought in some color!
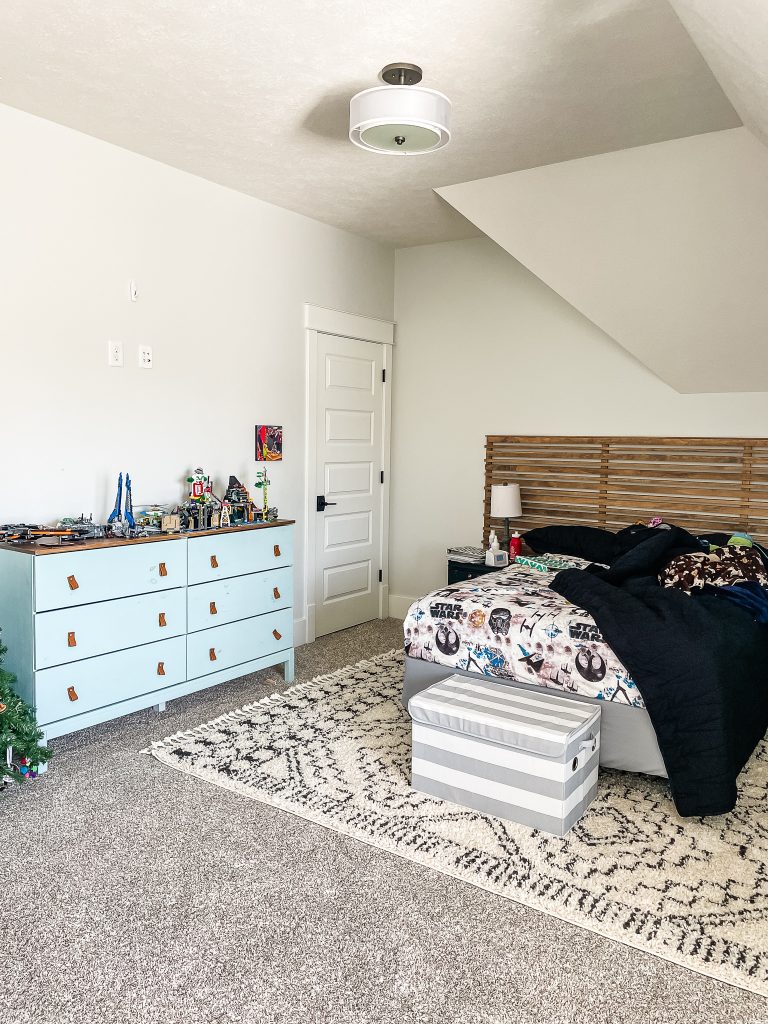
If you have young kids in your home, it’s highly likely that you have come across the same problem that we are having currently: LEGOS EVERYWHERE!
And yes, we definitely still have a Christmas Tree up in March. Oops!
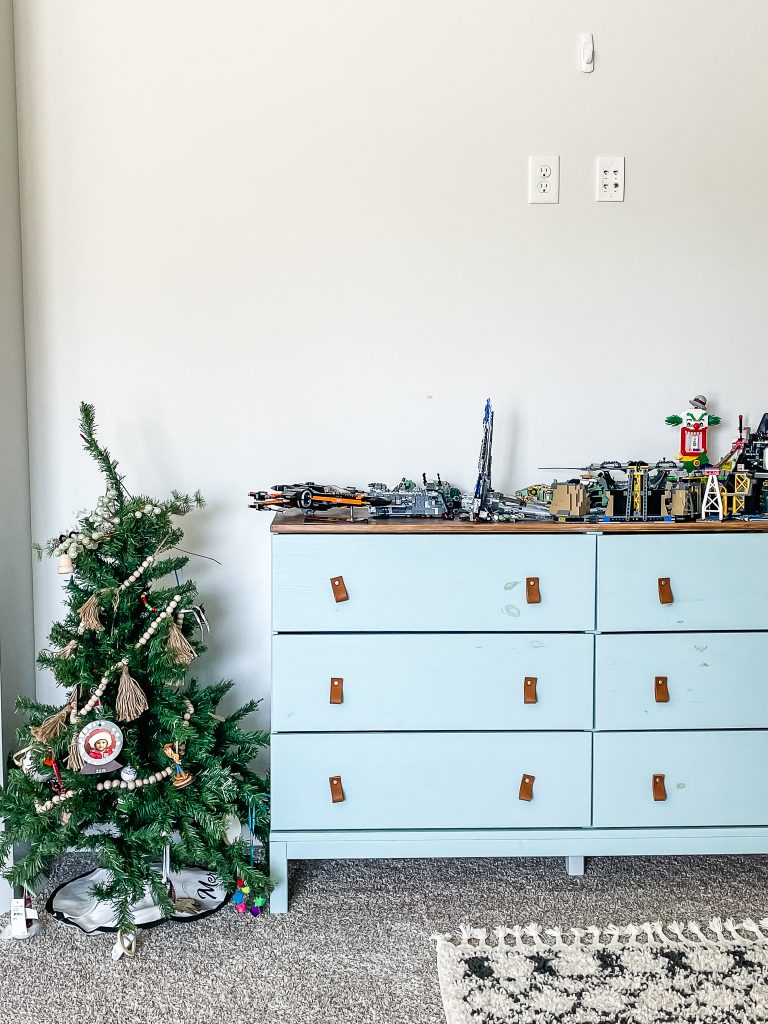
Xander has really gotten into large Lego sets over the past year. Since he also has two younger brothers that are tiny tornadoes, he has resorted to protecting his favorites on top of his dresser.
This past Christmas he had “Lego Shelves” on his wish list, and I told him I would love to build him some as one of my projects this year.
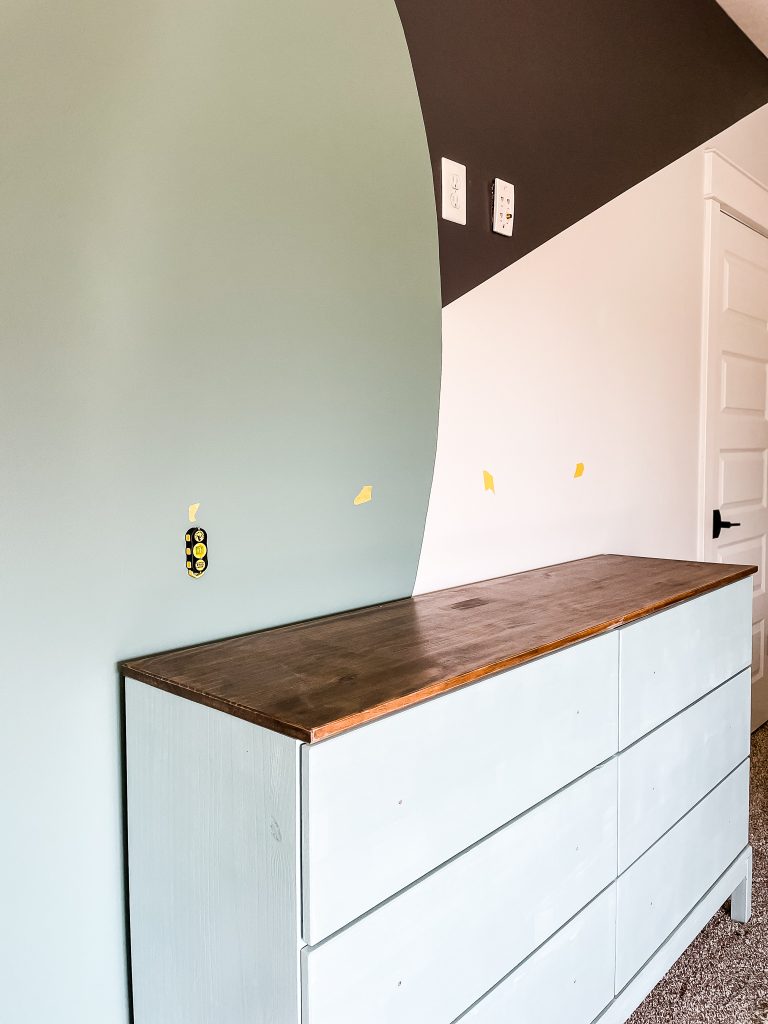
We also decided to do a fun geometric accent wall behind the shelves and here’s how I mapped it all out.
how DO YOU Build LEGO STORAGE SHELVES?
Open shelving is a really simple project, perfect for a beginning DIY’er. It involves minimal tools, minimal supplies, and only a few hours of work.
Supplies Needed:
- Brackets
- 1x boards (choose the same width board as your bracket)
- Stain or Paint
Tools Needed:
- Miter Saw (or have your boards cut to size at Home Depot)
- Orbital Sander (or sanding blocks)
- Drill
- Level
- Stud Finder
- Measuring Tape
WHAT KIND OF WOOD DO YOU USE FOR DIY LEGO DISPLAY SHELVES?
Because of the brackets that I chose, it worked out best to use 1X boards. I purchased the 10″ brackets, which fit perfectly with a 10″ wide board, but the brackets have 8″ and 12″ options as well.
You can really use any wood species for this project but I opted for common pine board to keep costs down.
How much do DIY LEGO DISPLAY shelVES cost?
I purchased 1x10x8 common pine boards at $21 per piece.
I also purchased shelf brackets at $19 per set of 4.
All other supplies I already had on hand, so my total for 3 shelves was around $120.
SHOP TOOLS & SUPPLIES:

diy LEGO DISPLAY shelvES PROJECT PLANS:
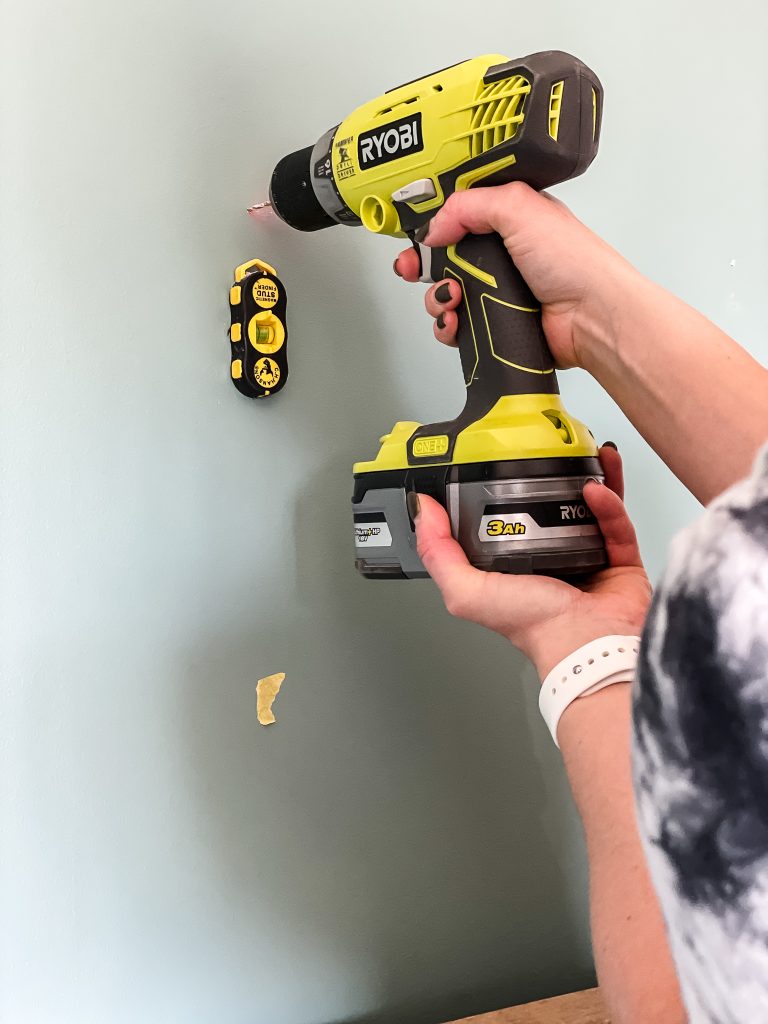
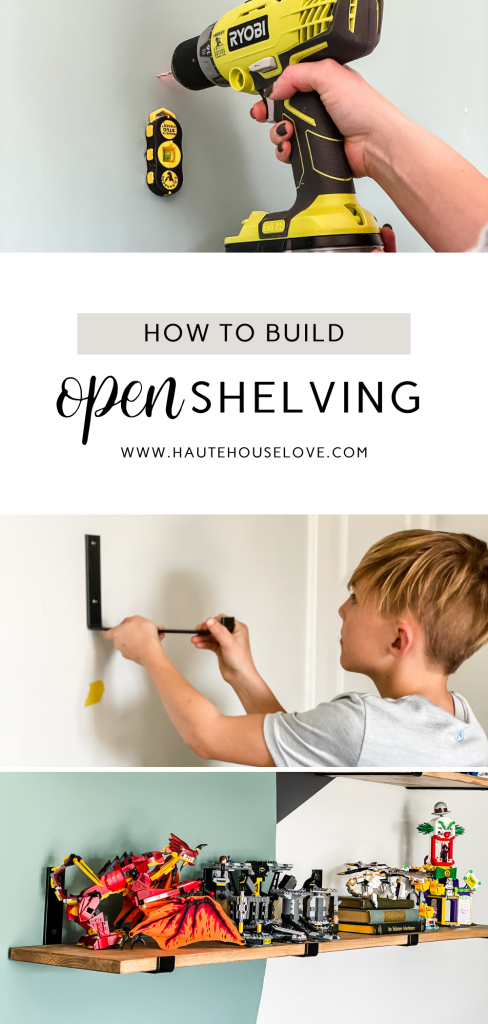
Step 1 – Locate studs on the wall
The brackets come with wall anchors but I think it’s super important (if at all possible) to drill the brackets directly into wall studs for added security.
When the studs have been located I like to mark them with tape so I can step back and look at the overall space before determining how many brackets to use and therefore how long to cut the shelves.
My favorite stud finder has a magnet on the back which is strong enough to go through the drywall and stick to the wall when it hits a drywall screw or nail.
Grab one for about $7 and I promise you will never miss a stud again!
Step 2 – Determine THE Shelf Length
Your shelf length will be determined by a couple of factors.
1- What looks best in the space visually?
With this being a fully customizable project, it’s important to evaluate the space you are working in to help determine shelf length. As a general rule of thumb, never make DIY open shelves longer than what’s below it. Instead, aim for a length that’s slightly shorter. This will help achieve vertical balance on your wall.
For Example: The dresser in this space is 60″ long. Therefore, the longest the shelves should be to achieve balance is 56″-58″. I wanted the shelves to be as long as possible for storage, so I chose to cut them at 56″
2 – How many studs will you hit?
In step 1, we located the studs on the wall. They should be 16″ apart. So that means that for every 16″ of the shelf you will need an additional bracket.
An 18-31″ shelf will require 2 brackets. A 32-47″ shelf will require 3 brackets. A 48″-62″ shelf will require 4 brackets.
Step 3 – Cut and Prep Shelves
At this point, it’s time to go to the hardware store for supplies if you haven’t already. If you don’t have a saw at home, head to your local Home Depot to purchase lumber and they can cut the boards for you!
Once the cuts are made, sand the boards then paint or stain them.
I stained my shelves with two coats of Minwax Special Walnut plus two coats of Polycrylic to match the top of the dresser.
Once the boards are prepped, it’s time to hang the shelf brackets!
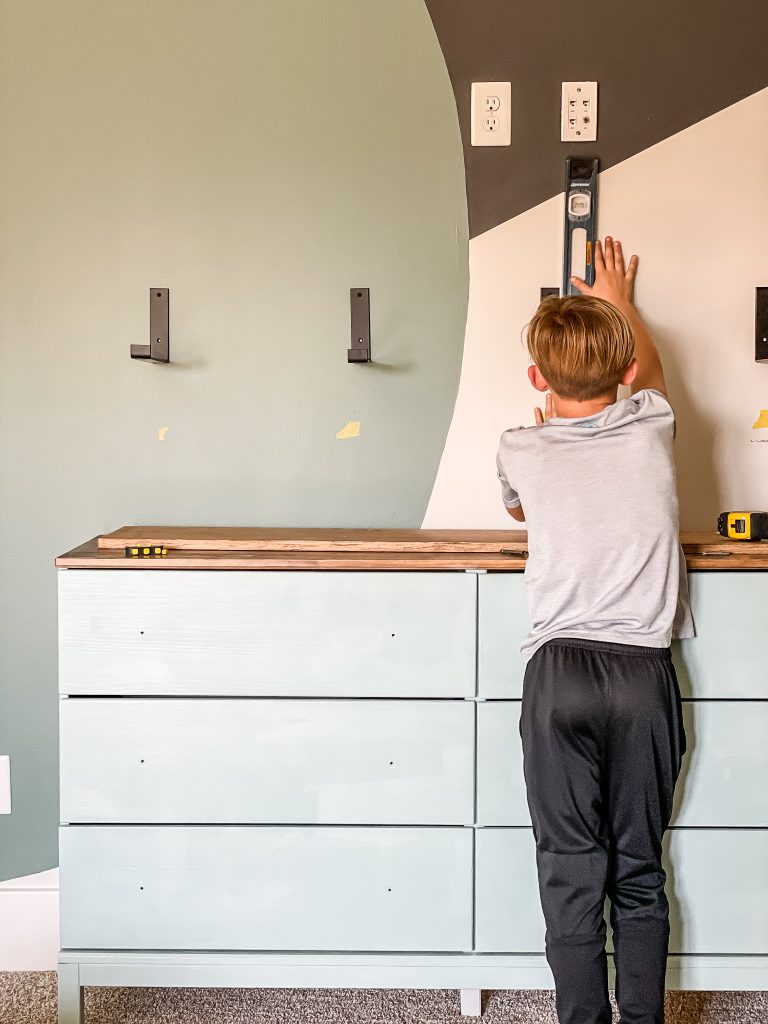
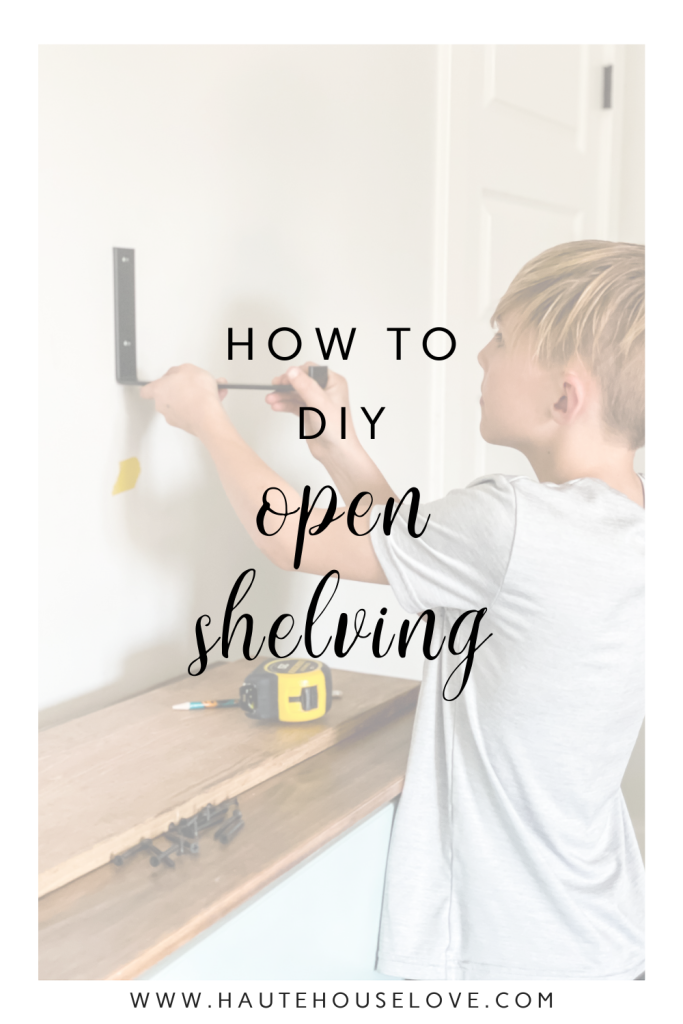
STEP 4 – How to install shelf brackeTs
I’m sure there are hundreds of tutorials out there for how to hang shelf brackets. These steps seemed to work the best for my brain!
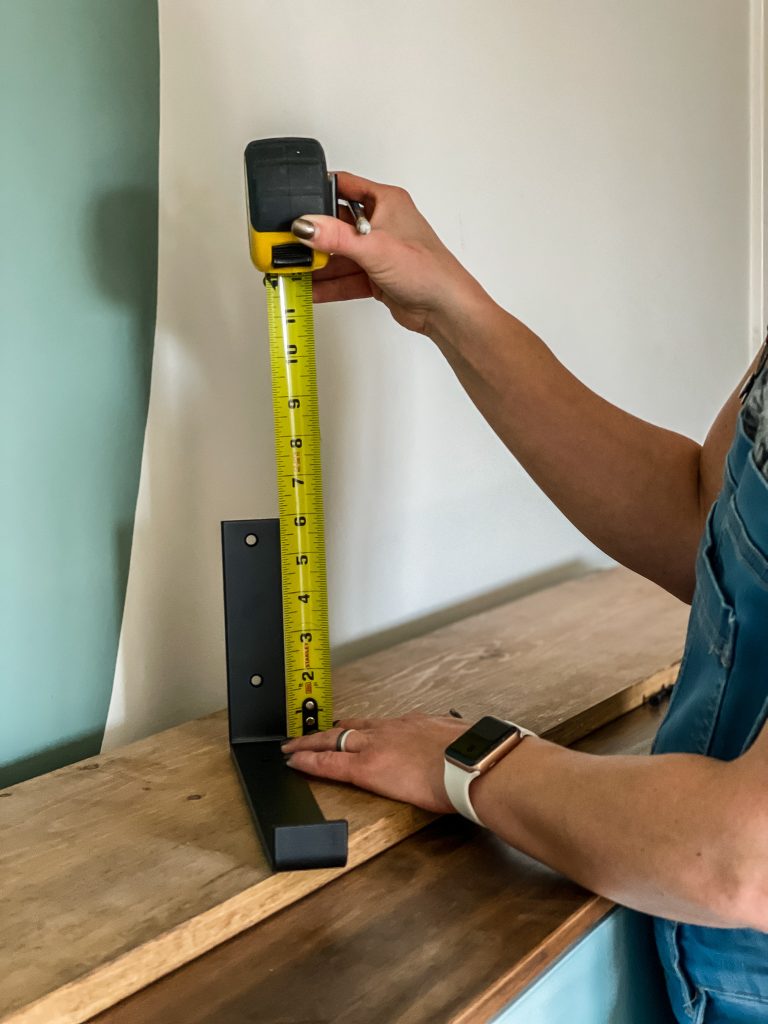
Determine the height of the bottom shelf. (I chose 14 inches) Then measure the distance from the bottom of the bracket to the top hole of the bracket. (Mine was 5.5 inches). Add the two together (mine was 19.5 inches) and make a mark on the wall.
Line up the laser lever horizontally across the mark that you just made. Then drill a pilot hole directly on the laser line, but also make sure you are over a tape mark that you made in step 1.
Here is a quick tutorial on how my favorite laser level works.
Drill all pilot holes for the first shelf before screwing in any of the brackets.
This will allow the laser to guide your placement without having to move it.
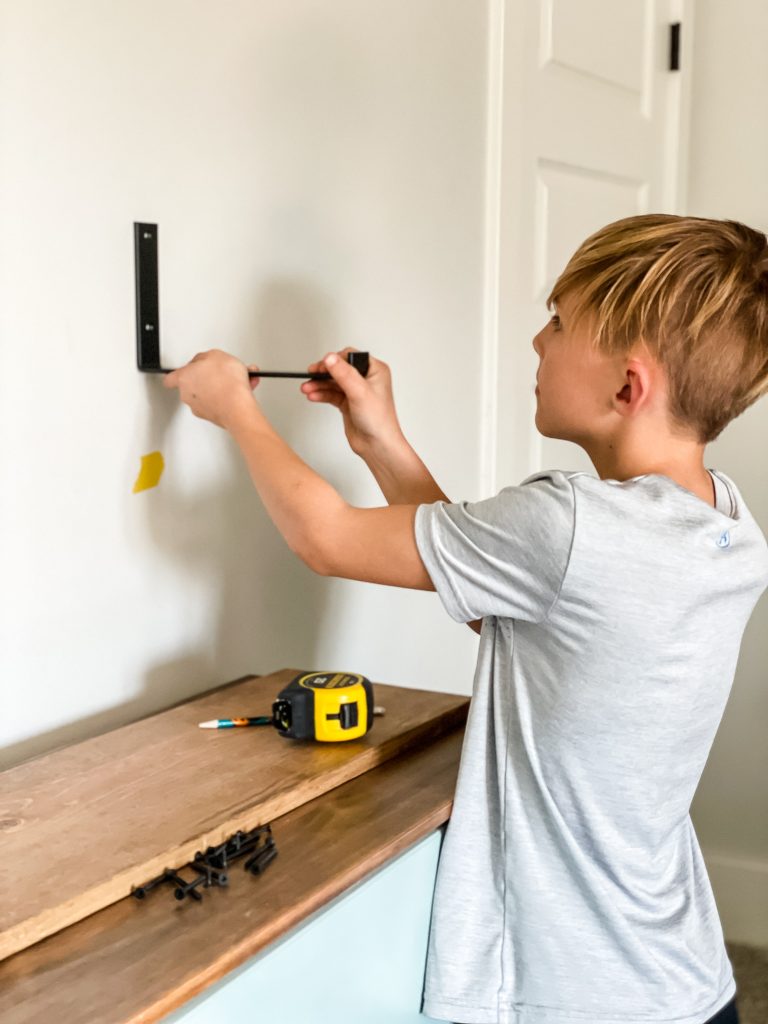
When all of the pilot holes are drilled, use the long screws to attach the brackets to the wall.
Finally, check that the bracket is level before drilling in the bottom pilot hole and screwing it into the wall.
Place your board on the brackets and check for accuracy. If all of your brackets are level it should look like the photo below.
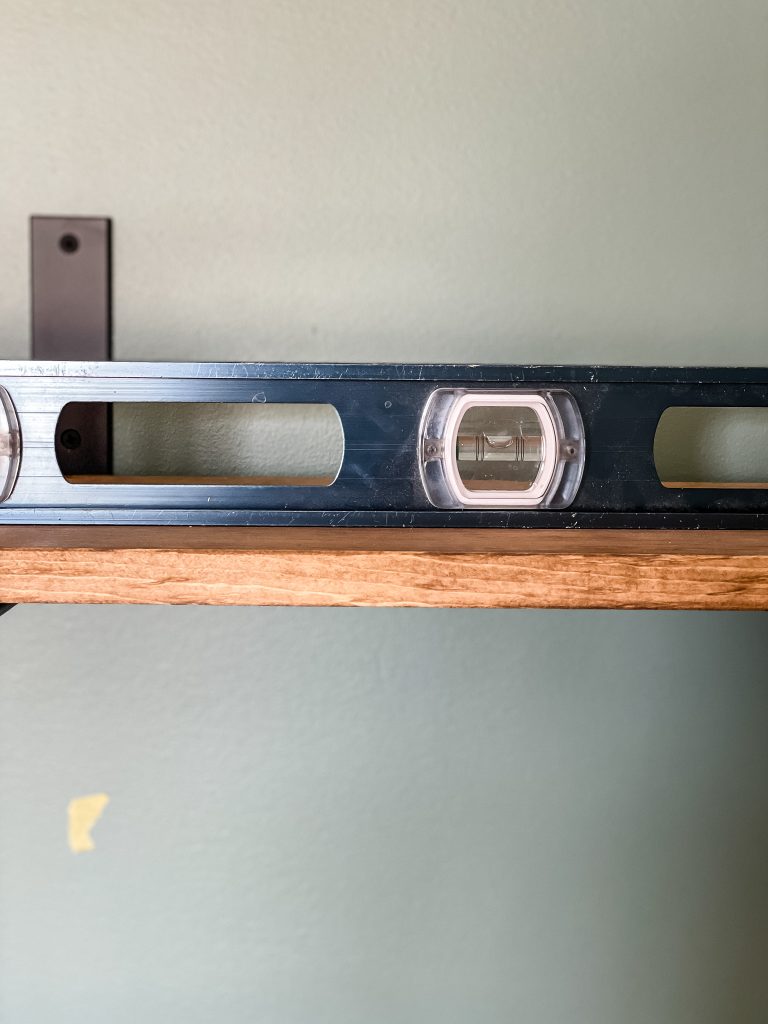
Install the next shelf with the same steps, but make sure to use the long level when lining up the brackets on the studs so that the brackets line up vertically.
Alternatively, place the laser level pointing down across the center of the screw hole of the first shelf, then measure 19.5 inches up the laser line to determine where your pilot hole should go.
When all of the brackets are hung, place the wood shelves and use the small screws to attach the bracket to the bottom of the shelf. No pilot holes will be needed for this step.
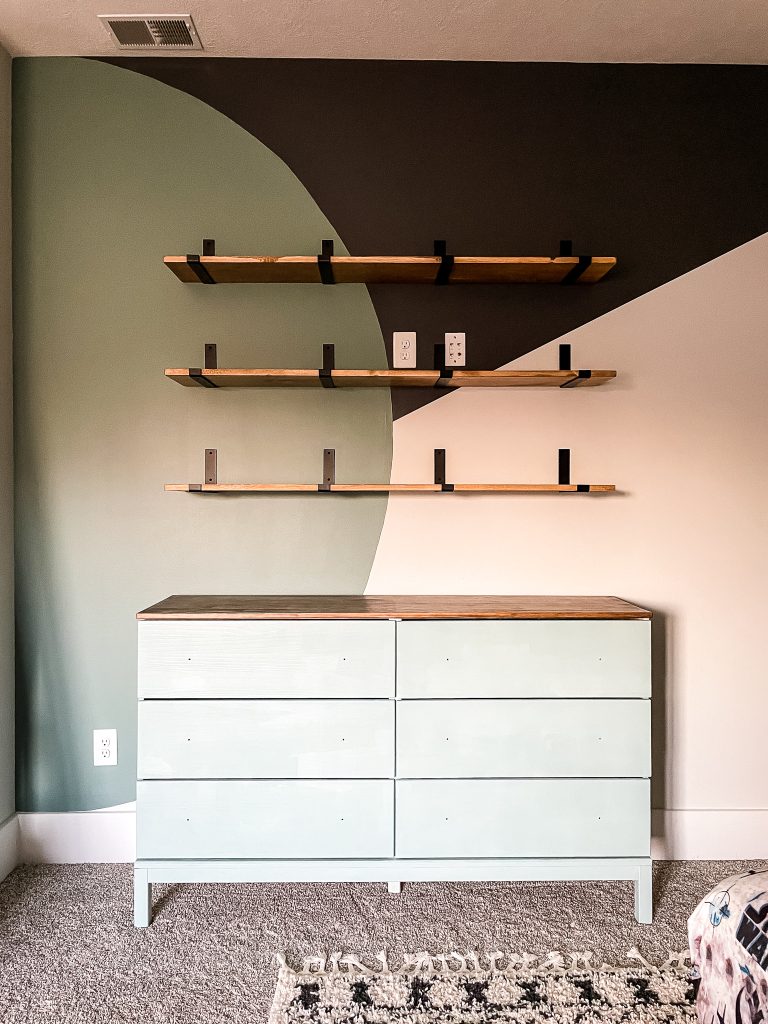
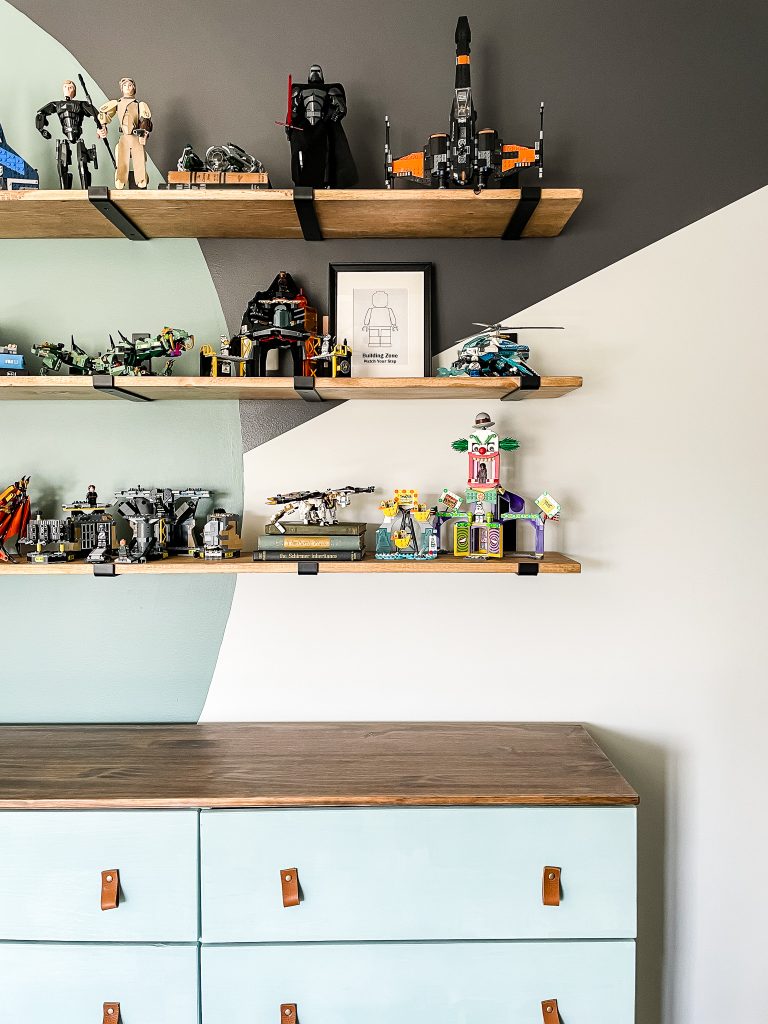
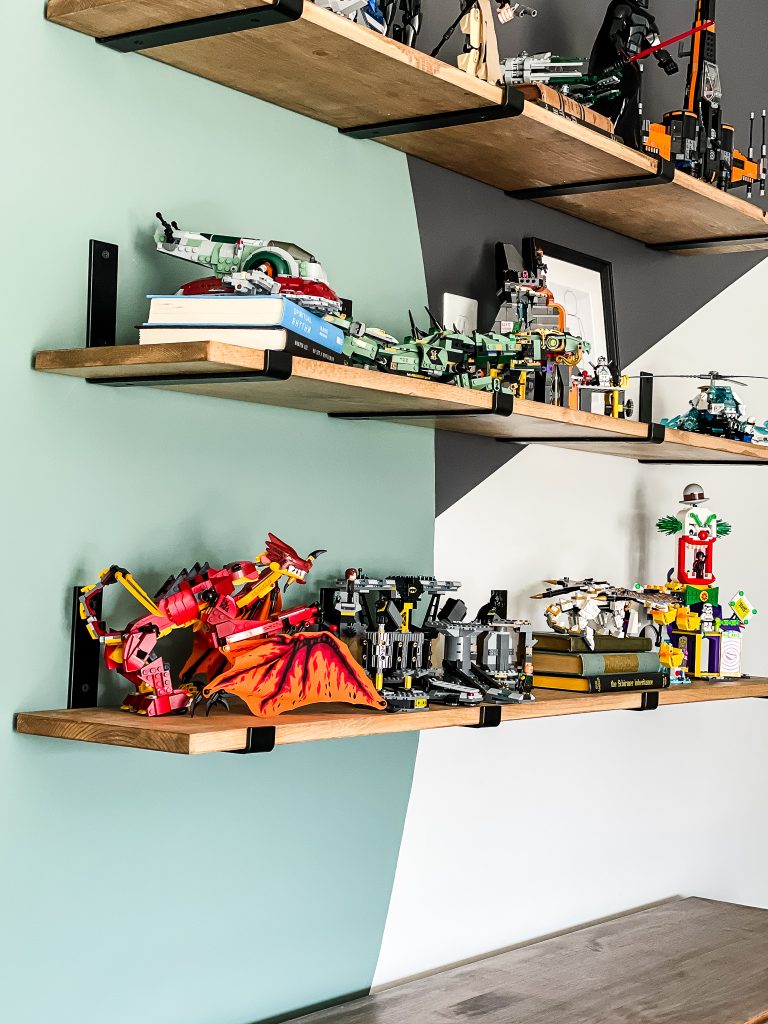
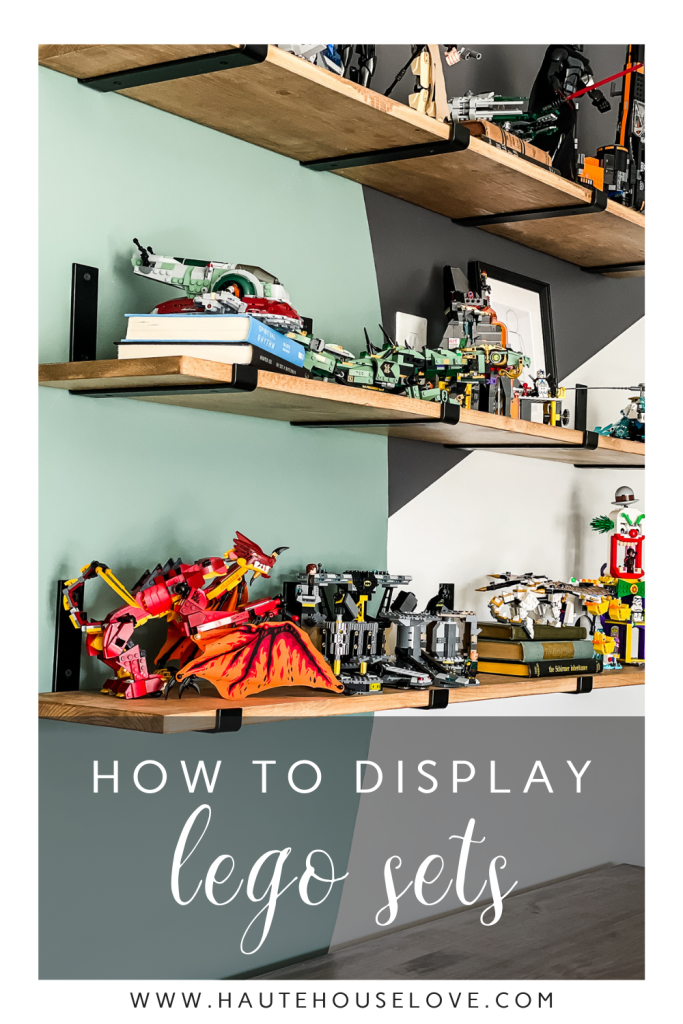
How DO YOU display lego sets?
With the open shelving complete, it was time to style the shelves! I placed the tallest sets on the top shelf, then distributed the others, making sure to step back often and adjust anything that didn’t quite look right.
I elevated a few of the shorter sets with books and made sure that the ones he played with most were within arm’s reach.
He arrived home from evening activities to a pretty great surprise.
OTHER Ways to use diy display shelves
I have made DIY display shelves in several other areas of my home and our vacation home. Take a peek at how I used them!
Let me know if you try these DIY display shelves in your own home!

Click one of the images below to save this project to pinterest and let me know if you try it!!
SHARE ON PINTEREST!
SHOP THIS POST
related diy Shelving Projects:
.