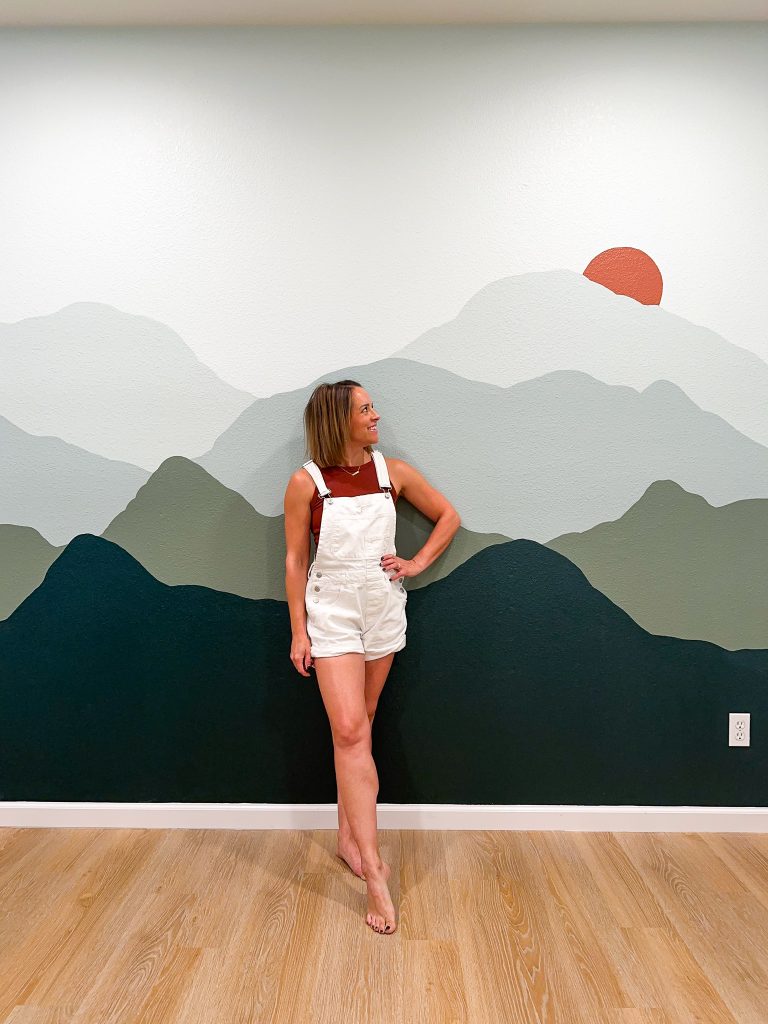
Need a fun and foolproof accent wall idea for kids? Check out the this easy DIY mountain Mural. A wow factor project that takes just one weekend to complete.
The kids are officially out of school which means we’ve transitioned to all of us under one roof all day, every day. So I’m pulling out all the stops to help keep the kids occupied while Tommy and I work from home.
The room I’m working on for this DIY mountain mural is located in the space the original builders called the formal dining room. Since we’re a family that’s far from formal dining, I’m transforming it into a maker space for the kids! This is a place where they can build and craft to their hearts’ content. But first, I’m giving it an attractive focal point with a wall mountain mural.

How to make a DIY Mountain Wall Mural
- Step 1: Search for inspiration
- Step 2: Sketch ideas on paper
- Step 3: Paint the base color (if needed)
- Step 4: Sketch the top mountain outline (furthest from the back) and second from the top on the wall with pencil.
- Step 5: Paint the first mountain inside the pencil lines.
- Step 6: Add a second coat of paint
- Step 7: Repeat sketching and painting until all mountains are complete.
Keep reading for a more detailed tutorial which includes video, FAQs and tips and tricks to creating a successful DIY mountain mural.
supplies needed for a wall mural
- Painters Tape – to protect your baseboards from drips (um, I didn’t do this and I regret it. Read: lots of splatters.)
- 2″ angled paint brushes (2 minimum) – to prevent from having to wash and then waiting for the brush to dry between each color. NOTE** If you want smaller details in your mountains a few craft paint brushes could come in handy also.
- Latex wall paint (in at least 5 colors). – keep reading for details on how to choose paint colors for this project
mountain mural Tips & Tricks
There are a few things to keep in mind before you begin your DIY Mountain Mural.
1- using a pencil to pre-draw your mountains on paper and then the wall will save a lot of time. It’s easy to erase or paint over pencil lines
2- When you are painting, step back often to check for balance. If one side feels off (like its heavier than the other), add more paint!
3- Don’t be afraid to mess up. It’s just paint! This mural is so easy because it’s so forgiving! It’s so easy to add and take away, because paint is just paint!
Choosing mountain mural paint colors
How do you choose paint colors for a DIY Mountain Mural? Start with paint that you have leftover from other rooms in your home! Using paint you already have is a great way to not only reduce the cost of this mural, but it also helps to create cohesion in your home!
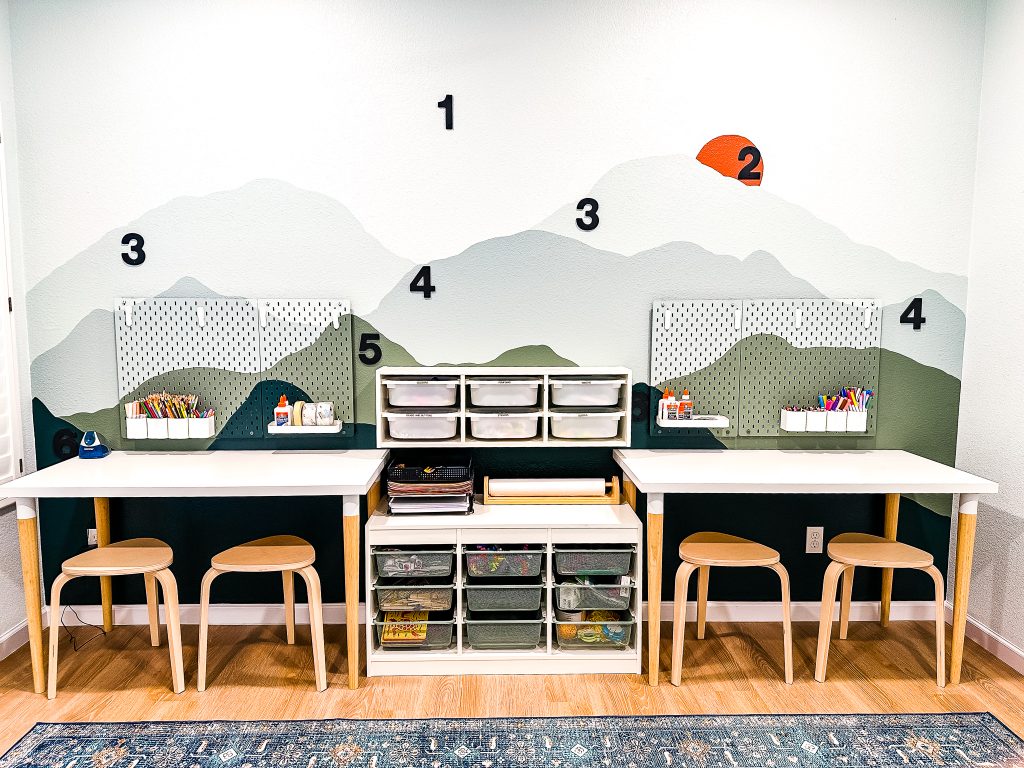
As far as paint colors you will need a background color + 4-5 mountain colors
(I also added an additional color for a sun but that step is completely optional)
You want the lightest color to be on the top then go darker as you go down the wall to create depth.
Colors in my mountain mural:
Sherwin Williams – Roycroft Adobe
Sherwin Williams – Dried Thyme
choosing paint colors from scratch
Choosing paint colors for a DIY Mountain Mural may seem tricky but its actually very simple with this tip!
I would always recommend starting with at least 1 color that you already have in your home to help create cohesion.
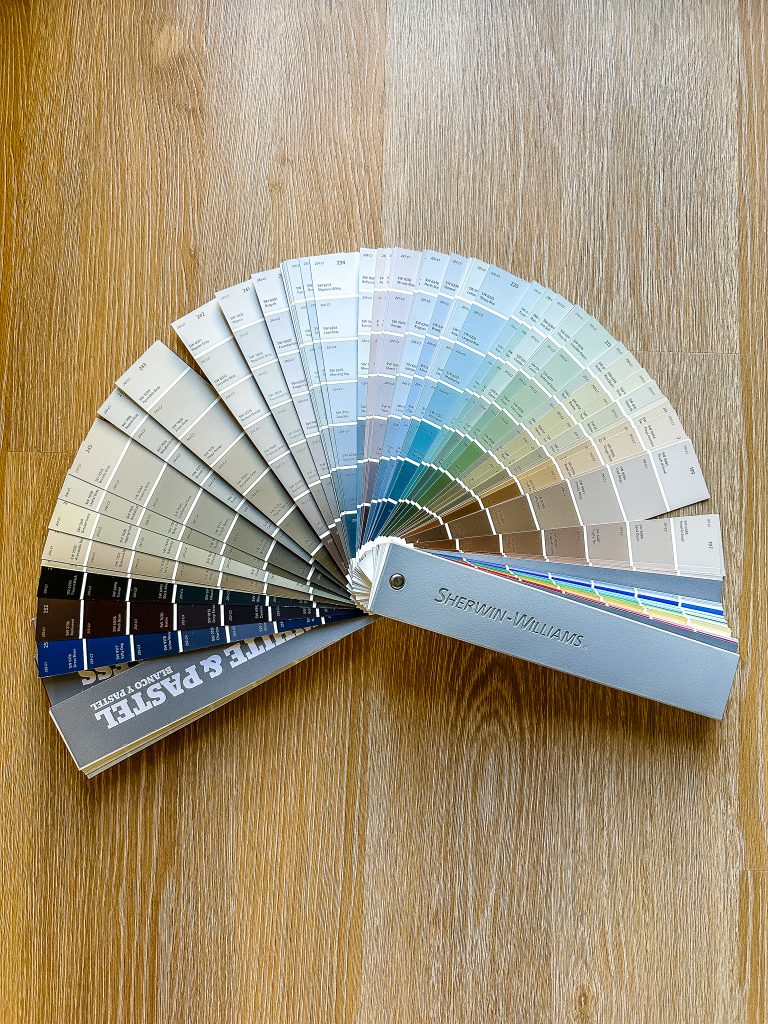
To choose other colors, simply look at a paint fan deck! (If you don’t have a fan deck, paint stores will typically have their paint swatches lined up in the same order as their fan decks.)

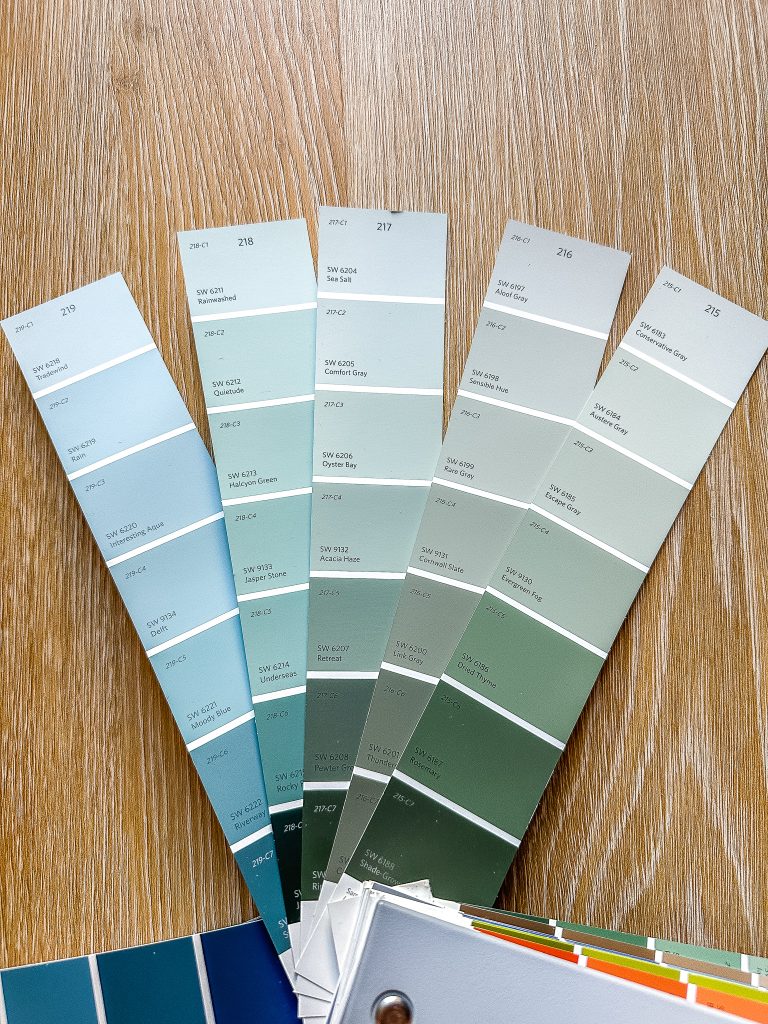
Do you notice how the colors go from light to dark? These are different shades of a color. When choosing paint colors for a DIY Mountain Mural you want to choose one color per shade. Otherwise the colors will blend together.
The top color could be your base color. The second color down could be your top mountain. The fourth color down could be your second mountain, etc.
You can go directly down one paint strip and choose colors that way, OR you could vary the colors from a few of the fans next to each other.

All of these colors could easily mix and match in a DIY Mountain Mural. Again, just make sure to choose only one shade from a horizontal row
Step-By-Step Tutorial for Painting a Mountain Wall Mural
(Step by step video)
Step One: Search for inspiration outside if you live in a mountainous area, or on Pinterest to get an idea of how to shape your mountains. If you find a photo on Pinterest that you like you can easily mimic that instead of free handing your own.
Step Two: Freehand a mountain sketch on paper if you are creating your own, This will give you a reference point for step 3. For an extra special touch: Consider adding in skylines of popular mountains in your area or mountains that you love to hike. Remember that the beauty of mountains is that they are not perfect or symmetrical. Anything goes!
Step Three: Paint the background color. To make it easy the background color can easily be the color of adjacent walls as long as it is a light color. If the adjacent walls are dark or if the wall needs a fresh coat of paint in general start with that. To save paint, you really only need to paint the top half of the wall.
Need tips for painting walls: Check out my post on HOW TO PAINT LIKE A PRO.
Step Four: Sketch the top mountains on your wall with pencil. I like to sketch the first two mountains so I have a guideline when painting. Add a new pencil line with each new paint color
Step Five: Add the first color of paint, going along your pencil guidelines like a paint by number or coloring. Honestly this step is pretty fool proof because you can’t really mess up mountains. Don’t be afraid to add an extra curve here and there. Imperfection is welcome here!
If you have a large area to paint, outline with a brush then switch it out for a 4″ (or larger) roller to help apply the paint faster.
Step Six: Wait 45 minutes to an hour for the paint to dry then add a second coat.
Step Seven: Repeat steps 4-6 until all mountains have been painted.
Easy DIY Mountain Mural FAQ’s
HOW LONG DOES IT TAKE TO PAINT A DIY MOUNTAIN MURAL?
A DIY Mountain Mural can easily be completed in a weekend. The longest part is waiting for the paint to dry. Once you have the mountains sketched out it only takes about 15-20 minutes to paint each coat (which can obviously vary depending on wall size).
Set a timer when you complete a coat as a reminder to start the next step.
HOW CAN YOU PAINT MOUNTAINS ON A WALL WITH TAPE?
If you are wanting a more modern/geometric look or are leery of your free handing skills a painters tape mountain wall may be more your speed. Apply painters tape on the walls to create peaks and valleys, making sure to step back often to achieve balance.
If you are taping over fresh paint use painters tape specifically made for delicate surfaces. (yellow Frogtape is perfect for this
When you are ready to paint use the paint over method to achieve a crisp paint line. The secret to crisp, clean lines: paint over the edge of your tape with the existing color of the wall. By brushing over the edge of the tape, you’re effectively sealing the paint, and any paint that bleeds through will match the existing color.
IS A MOUNTAIN WALL MURAL HARD TO PAINT OVER?
A little sanding/texture repair will likely be necessary when the time comes to paint over a wall mural. The amount of sanding/repair will greatly depend on the texture of your walls.
Heavily textured walls naturally hide brush lines better than flat walls. Textured walls will likely just need a light coat of spray texture to eliminate paint transitions from a wall mural.
Flat walls are a little harder to cover. Flat walls will need to be sanded to eliminate paint transitions from a mural. Start with a 120 grit sandpaper to remove paint build up, then a use 220 grit to smooth the wall. Then repaint!

With the mountain mural in place, I now have the perfect backdrop for the kids’ maker space. Stay tuned for details on the furniture pieces and maker supplies I used to bring this room to life!

